With Crowdmark’s Ready to grade workflow, you can scan and upload existing assessments in any format and grade them using Crowdmark’s online grading tools. Scan your completed assessments using the instructions here.
If you’d like to create an assessment template using tools such as anonymized grading, multiple choice auto-grading or automatic student matching, check out our Crowdmark booklet workflows.
Creating a Ready to grade assessment
- To begin, click Create assessment. Name your assessment, choose Administered (In-person) and select the Ready to grade option. Review your selections and click Done. You’ll be taken to the Assessment setup page.
- In the Template section, upload a blank version of your assessment. Crowdmark will use this template to recognize and separate the assessment booklets when you upload them. Verify the template looks correct using the preview provided, and click Save and continue to move to the Questions page.
Note: because Ready to grade assessments do not require a dedicated cover page, all pages will be visible in the grading interface. Student anonymity is not guaranteed.
Note: the booklet creation algorithm relies on the template text to split the pages, and at least 15 words are needed in order to differentiate booklet pages accurately. If your template does not contain more than 15 words, the splitter algorithm may not function as expected.
- Define the questions on your assessment template using the instructions here. This is how Crowdmark will know where the questions are located for grading.
Uploading completed assessments
- Scan your completed assessments according to the instructions here. If you’re used to scanning QR-coded assessments, make sure you are following the proper scanning workflow to get accurate results.
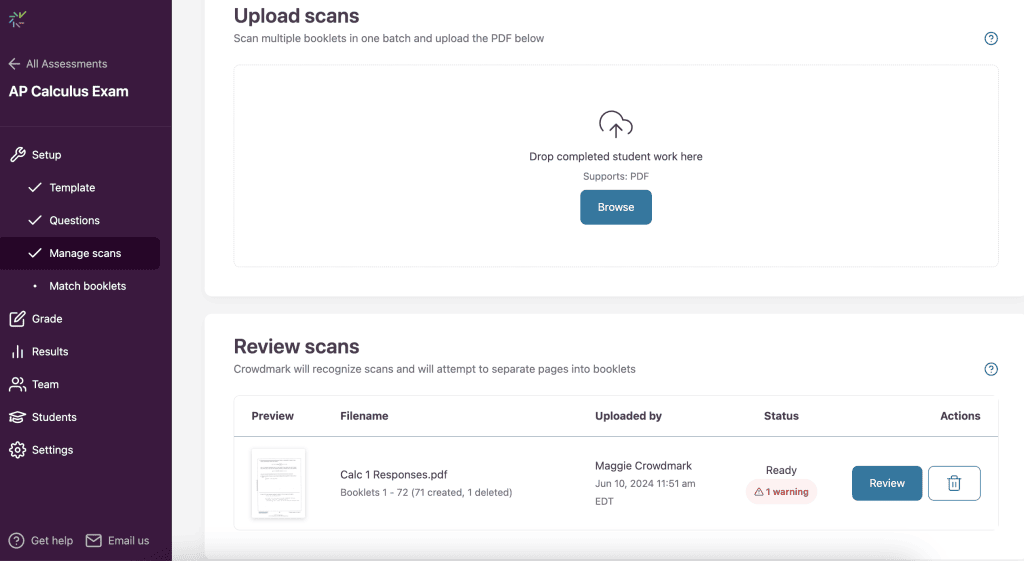
- In the Manage scans tab, click to browse or drag and drop the PDF files of your scanned assessments. You’ll see Crowdmark processing the uploads into separate booklets based on your template.
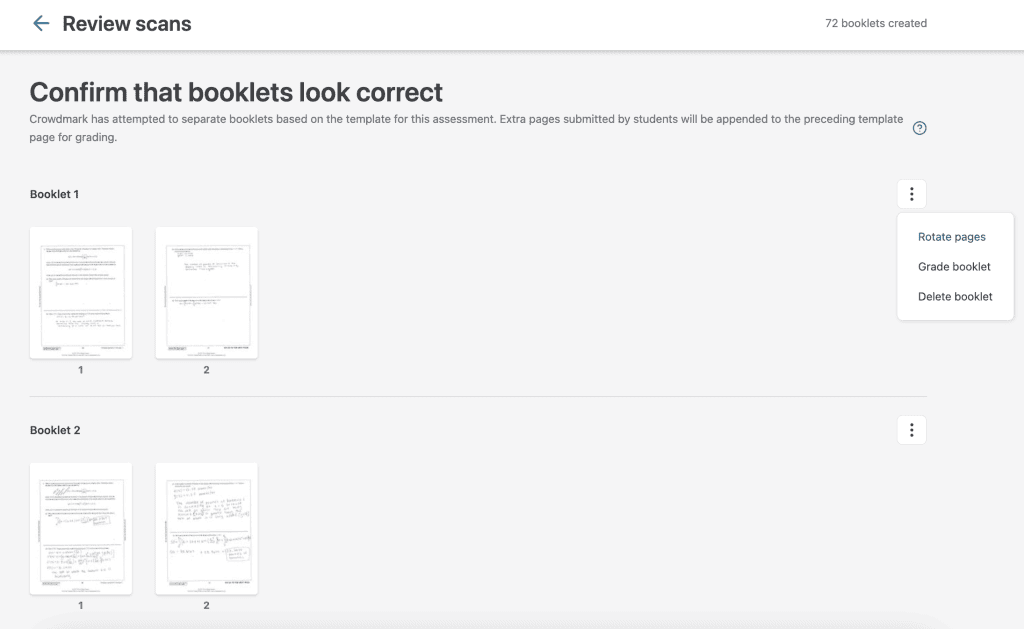
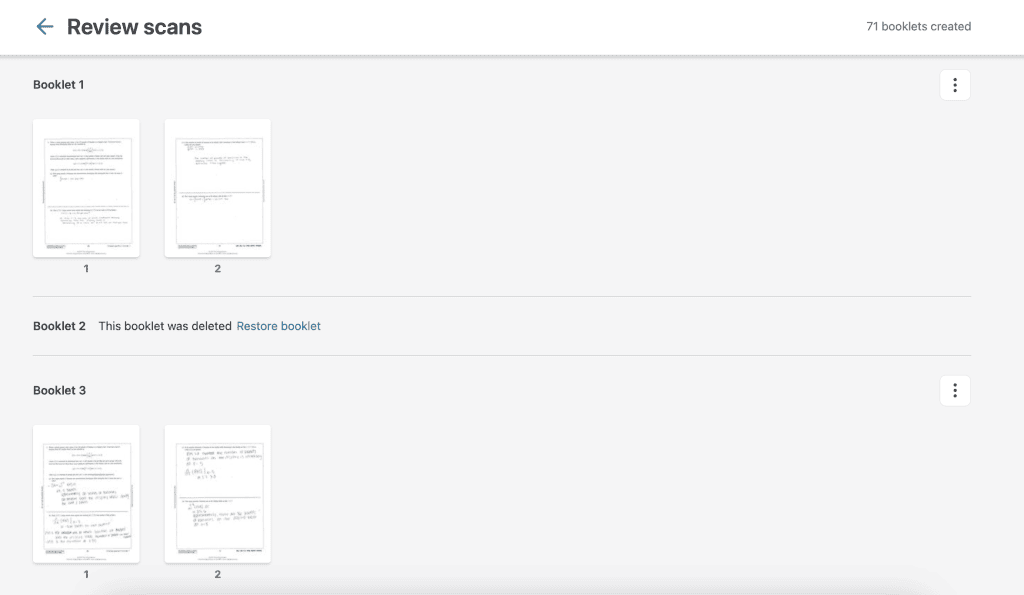
- Click Review to see and edit the booklets Crowdmark has recognized. Hovering over a page will allow you to zoom, rotate, delete or upload another page. Using the three dots menu on the far right, you can rotate, grade or delete the whole booklet. Whole number page numbers (1, 2, 3, etc.) are pages recognized as matching your template. Decimal page numbers (2.1, 2.2, 2.3, etc.) indicate extra pages that don’t match a template page.

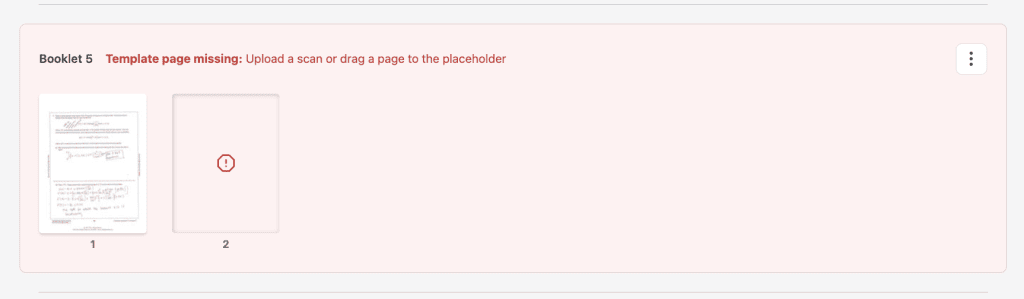
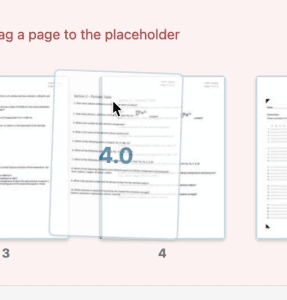
- If Crowdmark detects a missing page, you’ll see a red band and a warning with instructions. To fix a missing page, either upload a page or drag another page to the placeholder. You can drag template and extra pages within a booklet to reorder them or move them to other booklets.

- To replace a template page, drag the new page on top of it. The label will show the page number being replaced.
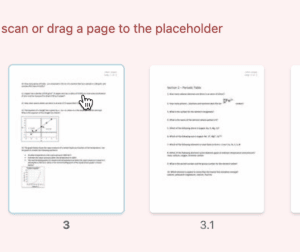
 To append a page, drag it to the side of the intended origin page. Watch for the page label to display which page number will be applied.

To maintain grading integrity, pages with evaluations cannot be moved. Removing evaluations from a page will restore mobility.- You can delete unwanted booklets at any time. When deleted, these booklets will be hidden and will not appear for grading. Deleted booklets can be restored from the Review scans page by clicking Restore booklet.

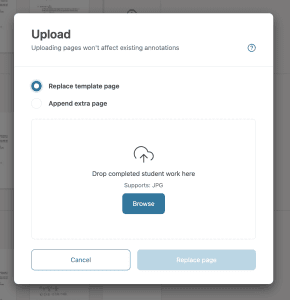
- Pages can be replaced, or extra pages can be appended to a booklet by clicking the upload icon on the page it’s meant to follow. A modal will appear. Click to indicate whether you’re replacing a template page, or uploading an extra page, then click to browse or drag and drop the necessary files. Note: appendix pages must be uploaded in JPG format. If you do not have the option to export the necessary file type from your original scan, you can use an online conversion tool.
 To preserve grading integrity, you will not be able to move pages that contain evaluations. Removing evaluations from a page will restore mobility.
 To append a page, drag it to the side of the intended origin page. Watch for the page label to display which page number will be applied.
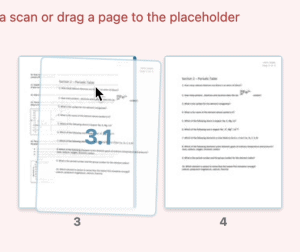
 To preserve grading integrity, you will not be able to move pages that contain evaluations. Removing evaluations from a page will restore mobility.
Next steps: