Once your students have written a Crowdmark booklet assessment, the booklets need to be scanned and uploaded to Crowdmark for matching and grading. If you’re uploading Ready to grade assessments, follow the instructions here. For more details on how to scan and format your batches of booklets, click here. If you need to add a specific team member to upload files, you can find instructions here.
Uploading QR-coded booklets to Crowdmark
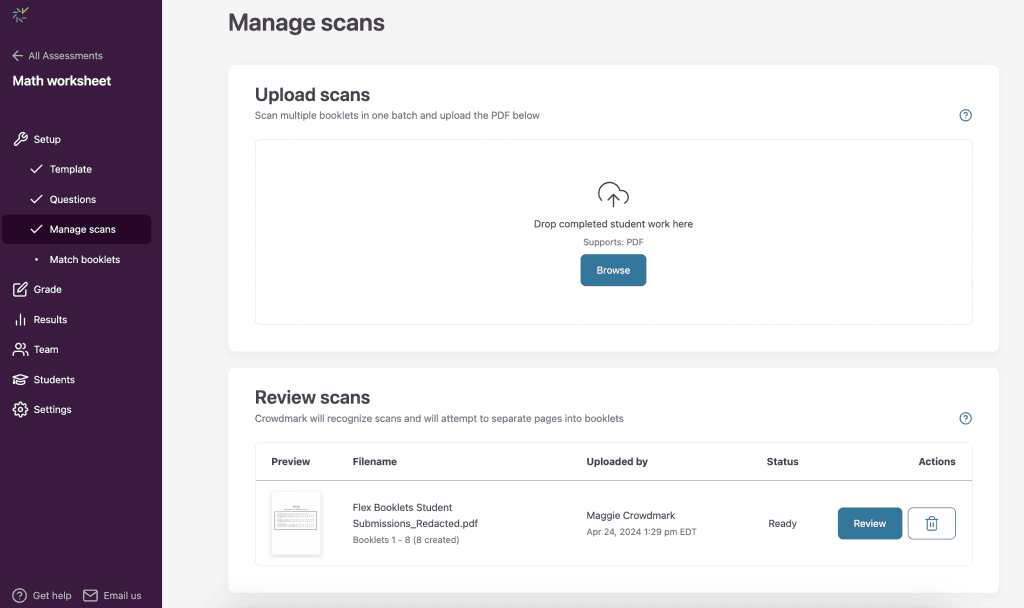
Click into the Manage scans tab of your assessment. Here you’ll see a box where you can drag and drop, or click to browse and upload your booklets. Crowdmark will process the QR codes and any errors will be listed below for fixing. QR coded booklets uploaded to a different assessment will always be routed to the correct assessment in Crowdmark, as long as the uploader has permissions in both places.
![]()
QR code errors in assessment upload
While uploading your exams, you may encounter an upload or processing error message.

Here are some common errors and solutions:
- Unprocessable file: Crowdmark could not identify a QR code on the page. It may have been tampered with, cut off, or otherwise obscured. If the text beside the QR code is still readable, you can fix this manually by clicking the Fix button. See “Fixing errors” below.
- The exam image must be a JPG or PDF: Crowdmark currently supports JPG and PDF file formats. If your files are in an unsupported format, you will have to rescan the images or convert them into the proper format.
- The exam must have a density of 150 DPI or more: The quality of your scans is not high enough. The system is calibrated for 200 DPI, so scans with less or more than this setting may appear blurred.
- QR code must be in the right place: Errors can happen if pages are scanned without proper borders, ratios or formatting. Extra white space around the page will cause the QR code to be in a different location than where it can be read.
Fixing errors
-
Click the All toggle button next to History limit the list to only show Errors.
-
Click the Fix button beside the error message. A modal window will appear.
-
Locate the UUID near the top of the image, beside the QR code. You may have to scroll sideways to find it. This is a combination of letters and numbers that uniquely identifies the assessment.

-
Click Select or type in the UUID and begin typing the UUID. Once you’ve located a match in the list, click on it to select it.
-
Click Save. Click outside of the modal window to return to the Uploads list.

Uploading duplicate QR codes
If a booklet is scanned incorrectly, poor quality, or otherwise needs to be replaced, you can simply upload a new scanned file. Crowdmark will recognize the QR code and replace the image. Uploading new QR-coded files does not affect existing matching or grading.
If you have students who have inadvertently written on duplicate booklets, they will not both be able to be uploaded to the same assessment, as the images will only be replaced. Duplicate booklets may be uploaded and graded by creating a separate Ready to grade assessment. Contact Crowdmark support if you have further questions or concerns.
Uploading non-QR coded booklets to Crowdmark
- In the Manage scans tab, click to browse or drag and drop the PDF files of your scanned assessments. You’ll see Crowdmark processing the uploads into separate booklets based on your template. Note: Unlike QR-coded booklets, uploading a booklet more than once will create a new booklet for grading.

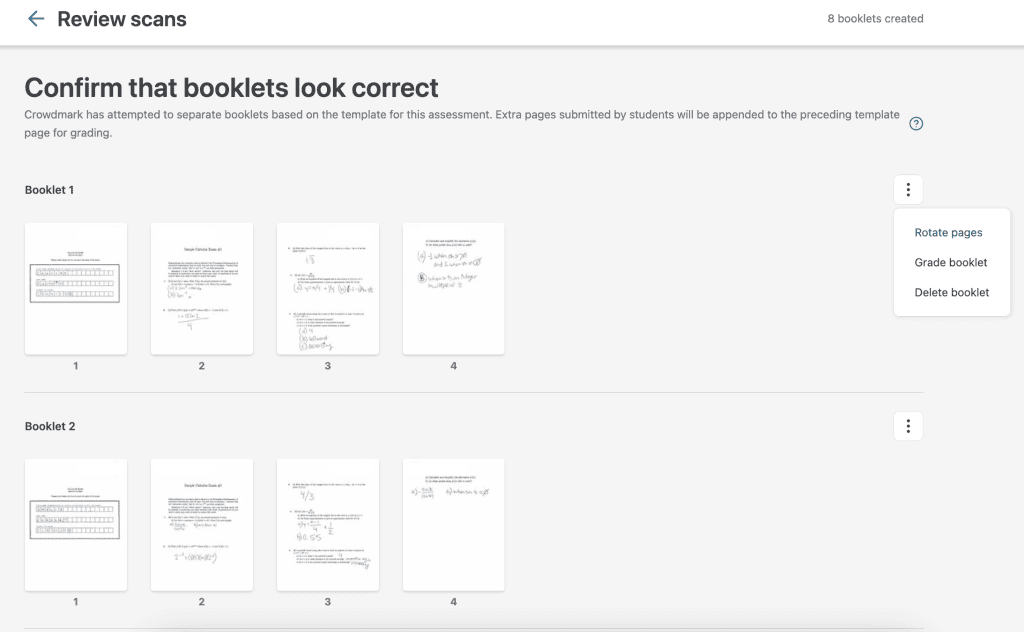
- Click Review to see and edit the booklets Crowdmark has recognized. Hovering over a page will allow you to zoom, rotate, delete or upload another page. Using the three dots menu on the far right, you can rotate, grade or delete the whole booklet.

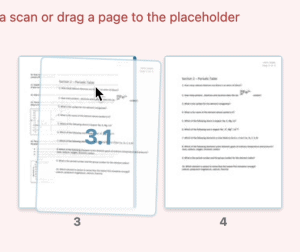
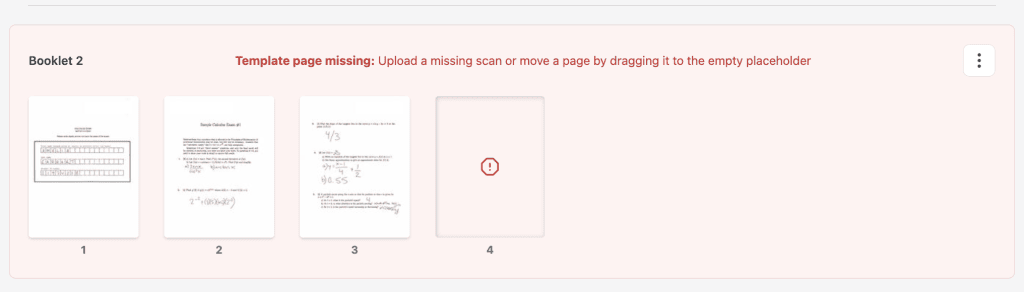
- If Crowdmark detects a missing page, you’ll see a red band and a warning with instructions. To fix a missing page, either upload a page or drag another page to the placeholder. You can drag template and extra pages within a booklet to reorder them or move them to other booklets.

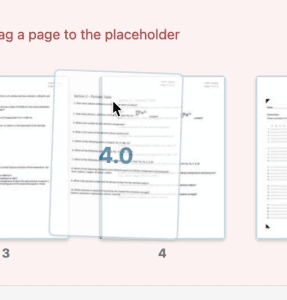
- To replace a template page, drag the new page on top of it. The label will show the page number being replaced.
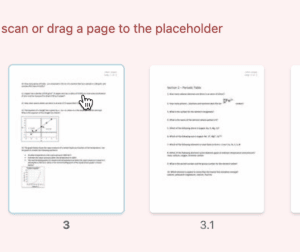
 To append a page, drag it to the side of the intended origin page. Watch for the page label to display which page number will be applied.
To maintain grading integrity, pages with evaluations cannot be moved. Removing evaluations from a page will restore mobility.- If a booklet is deleted, it will be labelled as such in the Review scans interface, and will not appear for grading. If a booklet was deleted by mistake, you can click Restore booklet.

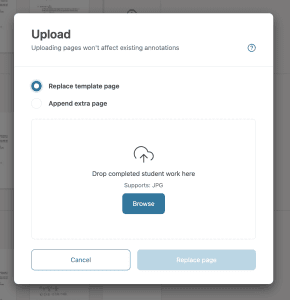
- If extra pages are not included in the same batch scan, pages can be replaced, or extra pages can be appended to a booklet by clicking the upload icon on the page it’s meant to follow. A modal will appear. Click to indicate whether you’re replacing a template page, or uploading an extra page, then click to browse or drag and drop the necessary files.

To preserve grading integrity, you will not be able to move pages that contain evaluations. Removing evaluations from a page will restore mobility.
 To append a page, drag it to the side of the intended origin page. Watch for the page label to display which page number will be applied.