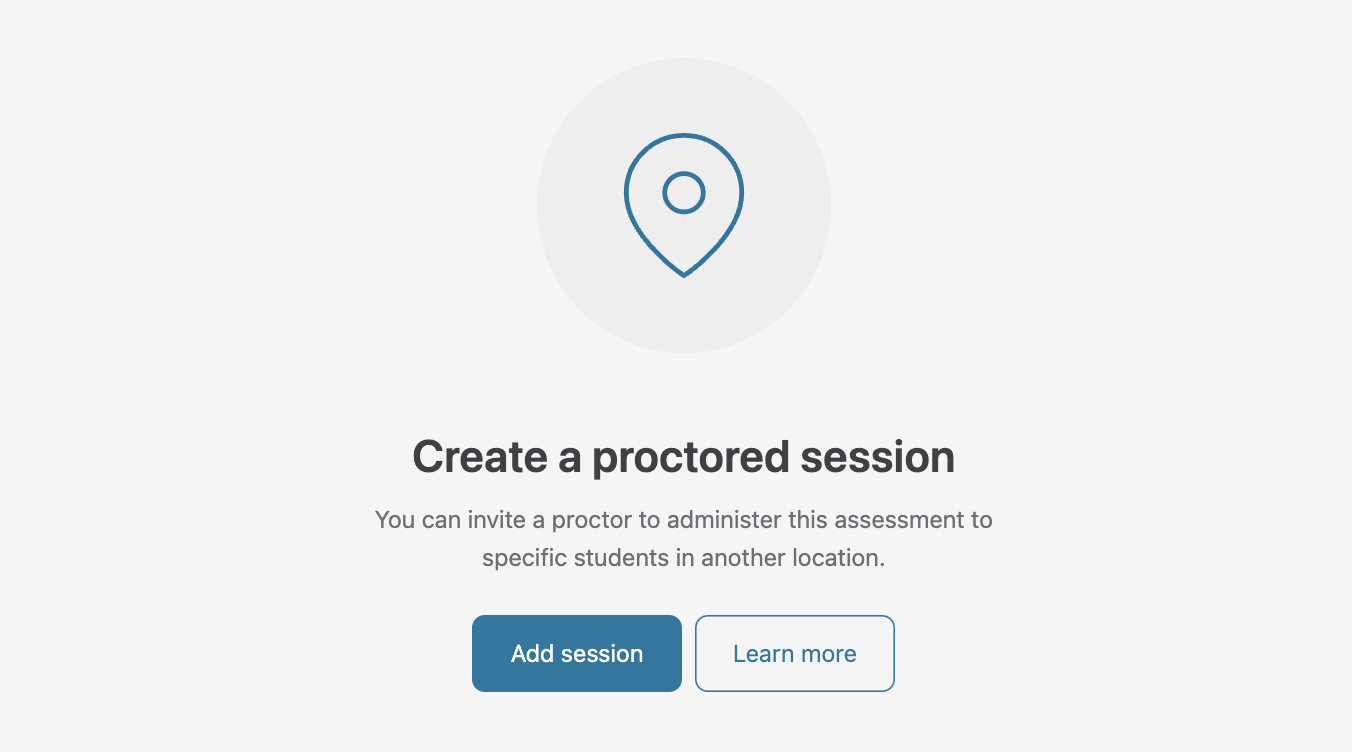
There are many reasons students may need to write paper exams from a different physical location, and Crowdmark offers a paper booklet workflow designed for offsite proctoring. Using this workflow, students who require accommodations from Accessibility services, international students or anyone else who won’t be present for a paper-based, QR coded exam will be able to have their work uploaded by an offsite proctor and graded by your team.
To start, you will enable the offsite session feature within an existing assessment. This feature provides a proctor with the resources to administer the exam and upload student work to Crowdmark. Creating a session and inviting a proctor will enable them to:
- Sign in to Crowdmark
- View the session details (date, location, participating students)
- Download a booklet for each student (a page is added to each booklet with the student and course information)
- Scan and upload completed exam booklets to Crowdmark
You will be able to track the proctor’s progress as they complete these tasks. Since each student is assigned to a specific booklet, there is no need to match the proctored assessments to students after the pages are uploaded.
Enabling offsite exam sessions
Offsite sessions need to be enabled per-assessment.
- Navigate to your assessment’s dashboard.
- Click Assessment settings.
- Click the Enable remote exam sessions toggle. A Sessions link will appear in the sidebar. This is where you can set up a remote session.
Creating an offsite session
After the remote sessions feature is enabled, you may create a session.
-
Click Sessions in the sidebar. The sessions table will appear.
-
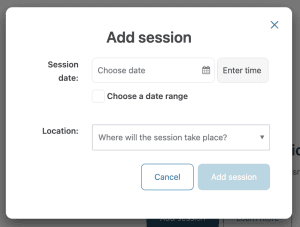
Click Add session. A window with setup options will appear.

-
Enter the Date and time your session will take place (if it doesn’t have a set date, you may choose a date range). Enter the Location (optional).
-
Click Add session. The Session details page will appear.
5. Under the Students section, click Add students.
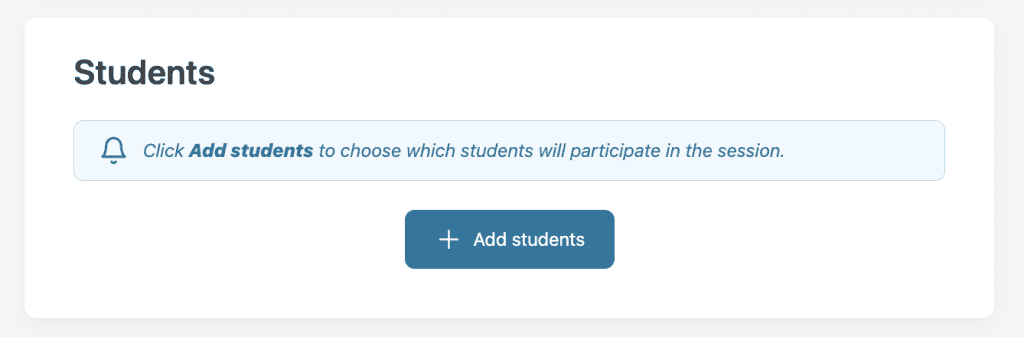
6. Enter the name or email addresses of one of the students who will participate in the session. As you type, Crowdmark will narrow down the class list. Select the correct student.
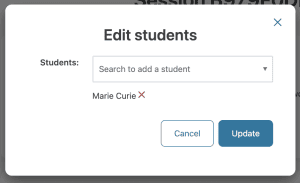
7. Repeat for each student, then click Update to add the students.
Inviting a proctor
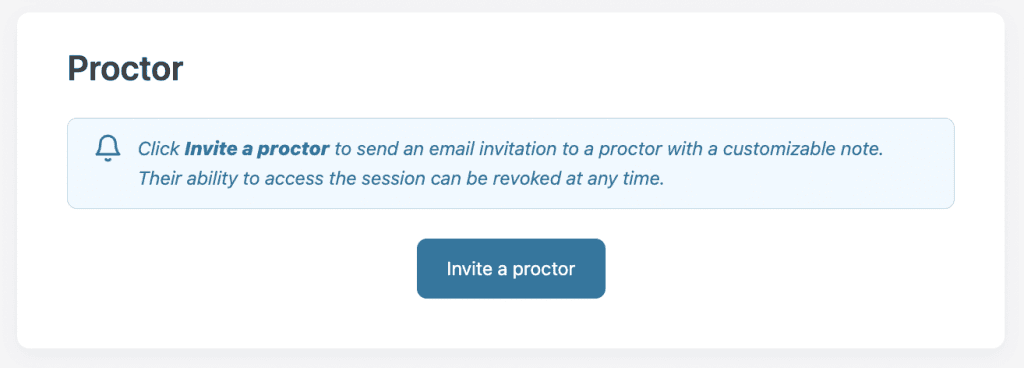
Once your session has been created and has students, you can invite the proctor to administer the exam.
-
Ensure that the session details page is open. Under the Proctor section, click Invite a proctor.

-
Enter the proctor’s email address, a note with any additional instructions you would like to include (optional), and your contact information (optional).

-
Click Invite proctor. An email will be sent to the proctor inviting them to sign in to Crowdmark to access the session details.

What will the proctor see?
-
The invitation email will include a button for the proctor to accept the invitation and view the session page. If the proctor doesn’t have a Crowdmark account, they will be prompted to sign up before accepting the invitation.

-
After accepting the invitation, the proctor will be directed to the session page.
Note: You can also access this page by navigating to the assessment’s Sessions page, then clicking the proctor’s name in the “View as proctor” column.
-
Each booklet the proctor downloads will be assigned and matched to a specific student. Crowdmark will add a page to the beginning of each booklet with student and course information to ensure that proctors distribute booklets to the correct students:


-
There is a link to documentation for proctors in the right sidebar of the session page: Proctoring a remote exam session.