Instructors can set up their assigned assessments to allow for group submissions. Instructors can form the groups of students or students can create their own groups. Any single member of the group can submit on behalf of the group and a single group assessment will be graded. To avoid overwriting submissions, we recommend that only one group member submits. All students in the group will receive a copy of the graded feedback in their Crowdmark portfolio.
What are the differences between group and individual submission?
- In an individual submission, each student submits their own work and receives grades and feedback to their own portfolio. In a group submission, one student submits on behalf of the group, and the group members each receive the same grades and feedback to their own portfolios.
- In an individual submission, each student must submit their own work. With a group submission, there is an option for students to choose to submit their work alone, or as a group. It’s important to note submissions cannot be combined or added to a group if they have been submitted individually.
- Group submissions allow options for instructors to create groups ahead of time in the Students page, or for students to add their own group members at time of submission.
Creating a group assignment
-
Create an Assigned assessment and tick the box to select Group submission.
-
Finish setting up the assessment by adding questions.
-
If you would like students to form their own groups, you can Distribute the assignment to students. (A description of what students will see is included below.)
-
The group members can be formed or edited by the instructor before or after the assignment has been distributed by navigating to the Students tab and clicking on the blue Edit Groups button at the top right.
-
To Edit Groups, simply drag the unassigned student names on the left to a group on the right. Students need to be removed from a group before they can be added to a different group. If the assignment has already been distributed, students will be notified by email when they are added to a group.
-
Returning to the Students list shows the newly formed groups. The group Activity log is accessible by clicking on the link for a group under the Status column. The log includes the addition or removal of group members and all submission activity for each individual user. Click for more information on verifying students’ submissions.
-
The student list will sort student groups alphabetically A-Z by default. When sorting the table using student names, the list will sort alphabetically using the first name of the first student in the group.
What Will Students See?
-
Once the assignment has been distributed, students will receive an email with a link to view the assignment.
-
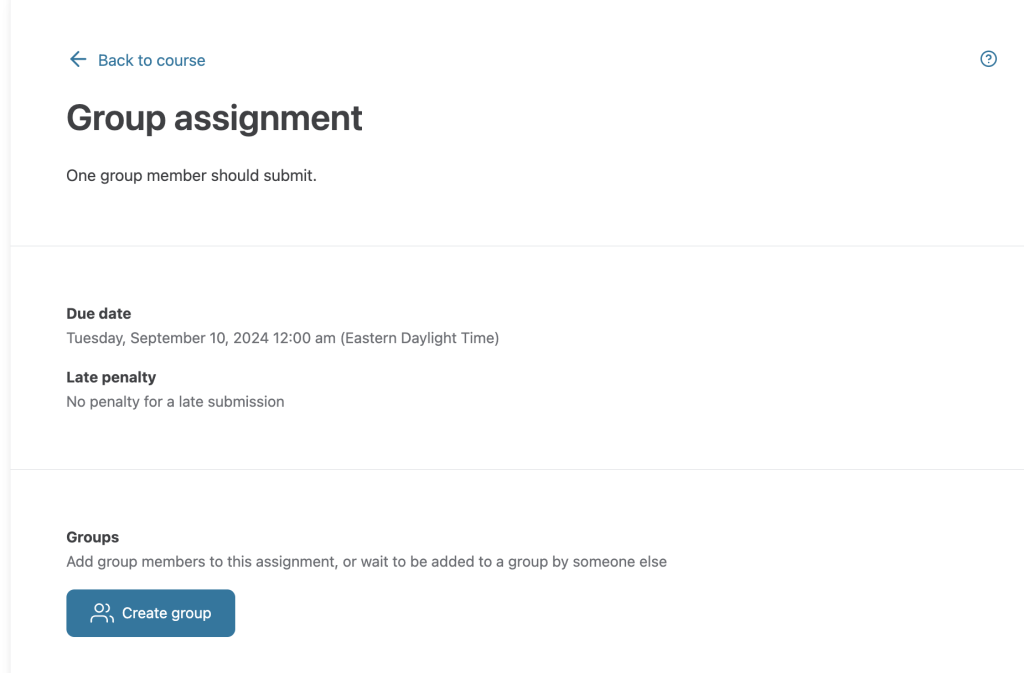
Students will need to click Create group to add or edit group members before submitting.

-
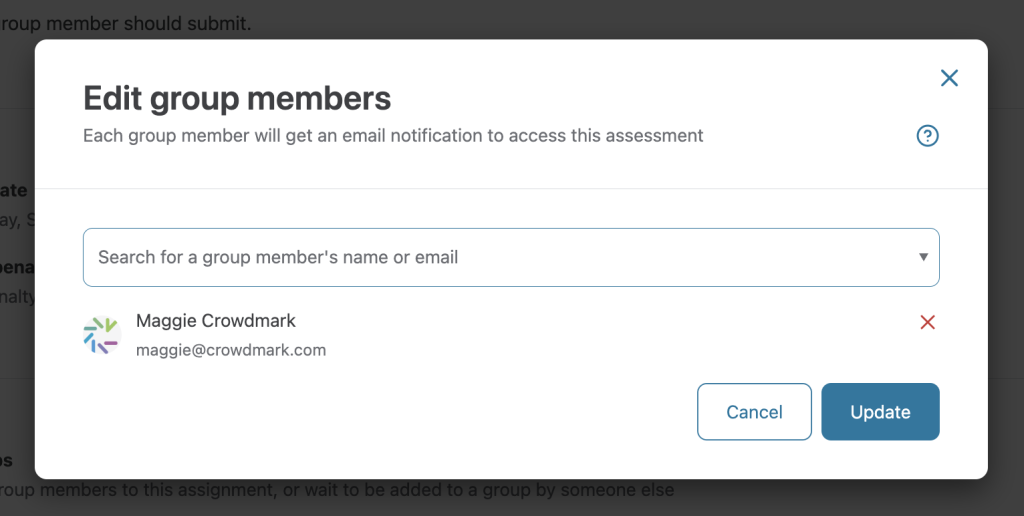
Students can type names or email addresses to search for their classmates. They can only add members who have not already been added to another group. Once a student is added to a group, they will see the submission page and the names of their group members at the top. Any member can submit work on behalf of the group. To avoid overwriting submissions, we recommend only one group member submits all the work.


-
Students will receive an email notification that they have been added to a group by a particular user.
-
Students also have access to the Activity log in their portflio. The log includes the addition or removal of group members and submission activity for each individual user.
-
Once a group assignment has been submitted, students will not be able to edit the group members. Students will need to contact their instructor to make any changes to group members after submission. Note: if students have submitted individually, moving students to a group will clear their individual submissions

