To enroll students in your Crowdmark course, you can either sync the roster with your institution’s Learning Management System (LMS) or upload a list of student emails. Optionally, you can include students’ names, ID numbers, and sections. You can access your student roster from the Students page in your course.
If you would like to sync your roster with your institution’s LMS, the steps vary depending on whether you use Canvas, Brightspace, Blackboard, or Moodle. For detailed instructions on syncing rosters with your specific LMS, please refer to the resources below:
If you don’t know where to find a list of your students’ emails or you have too many students to collect this list manually please contact your school’s IT department. They can likely generate a list of student email addresses for you.
Enrolling students
Students can be enrolled in two ways: by uploading a CSV file with your student roster or by pasting a list of student emails. An email address is all Crowdmark requires to enroll a student, but it is strongly recommended to upload students’ names and ID numbers as well. Some features, such as automated matching, need this information.
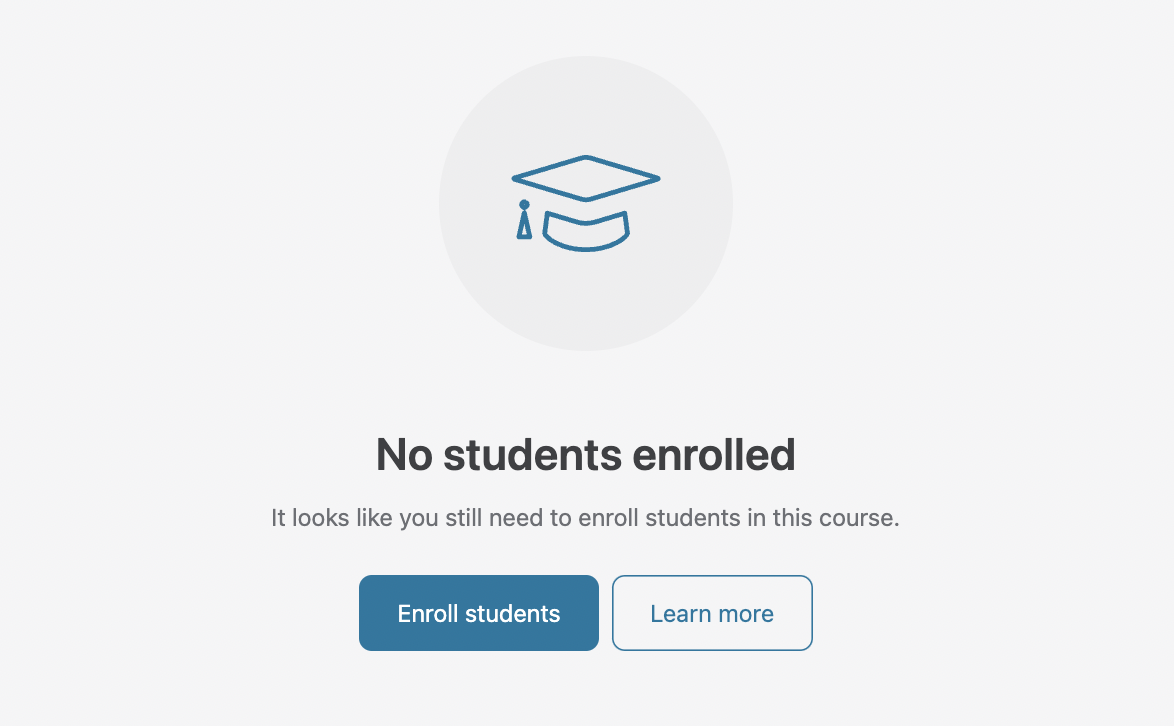
Students will not see the course or get any notifications from Crowdmark until you have set up an assessment.
Enrolling students with a CSV file
A CSV file can be exported from a spreadsheet using Excel or your preferred software. Your file should contain your full student roster with the following columns:
- Name (or separate First Name and Last Name)
Do not include middle names. - ID Number
- Section (if your course has sections)
An example CSV file:

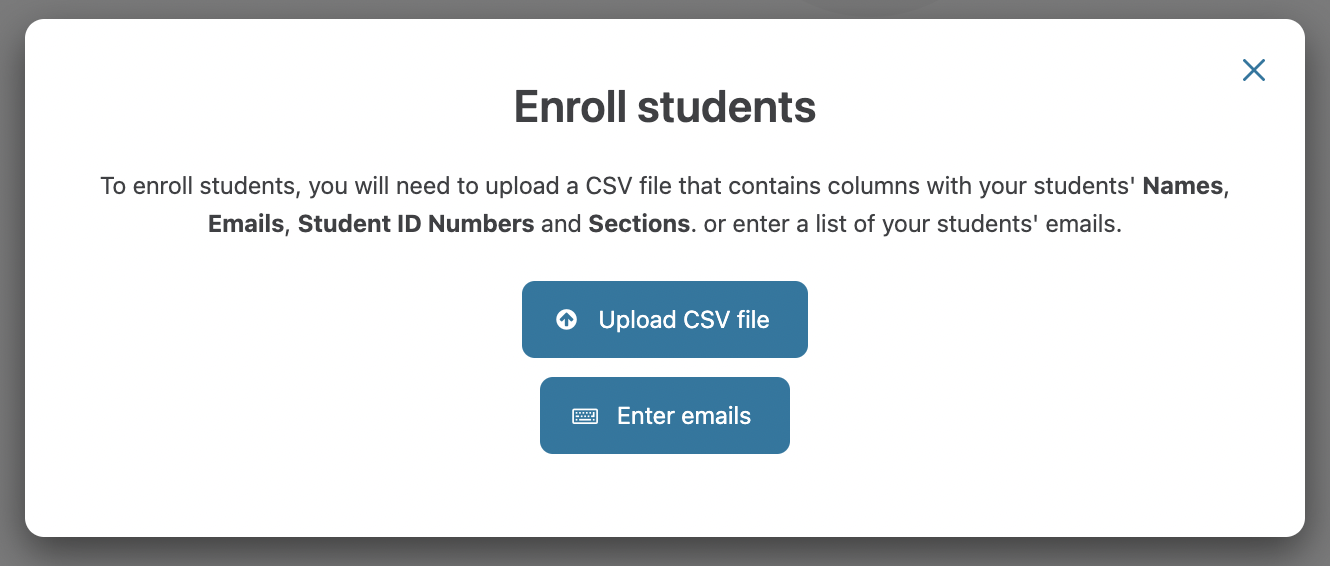
To enroll students:
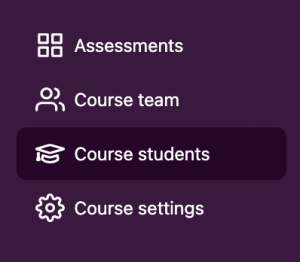
- In your course, click Course Students in the sidebar.
- Click the Enroll students button. A modal window will appear.

- Click the Upload CSV file button. Locate the CSV file on your computer and upload it.

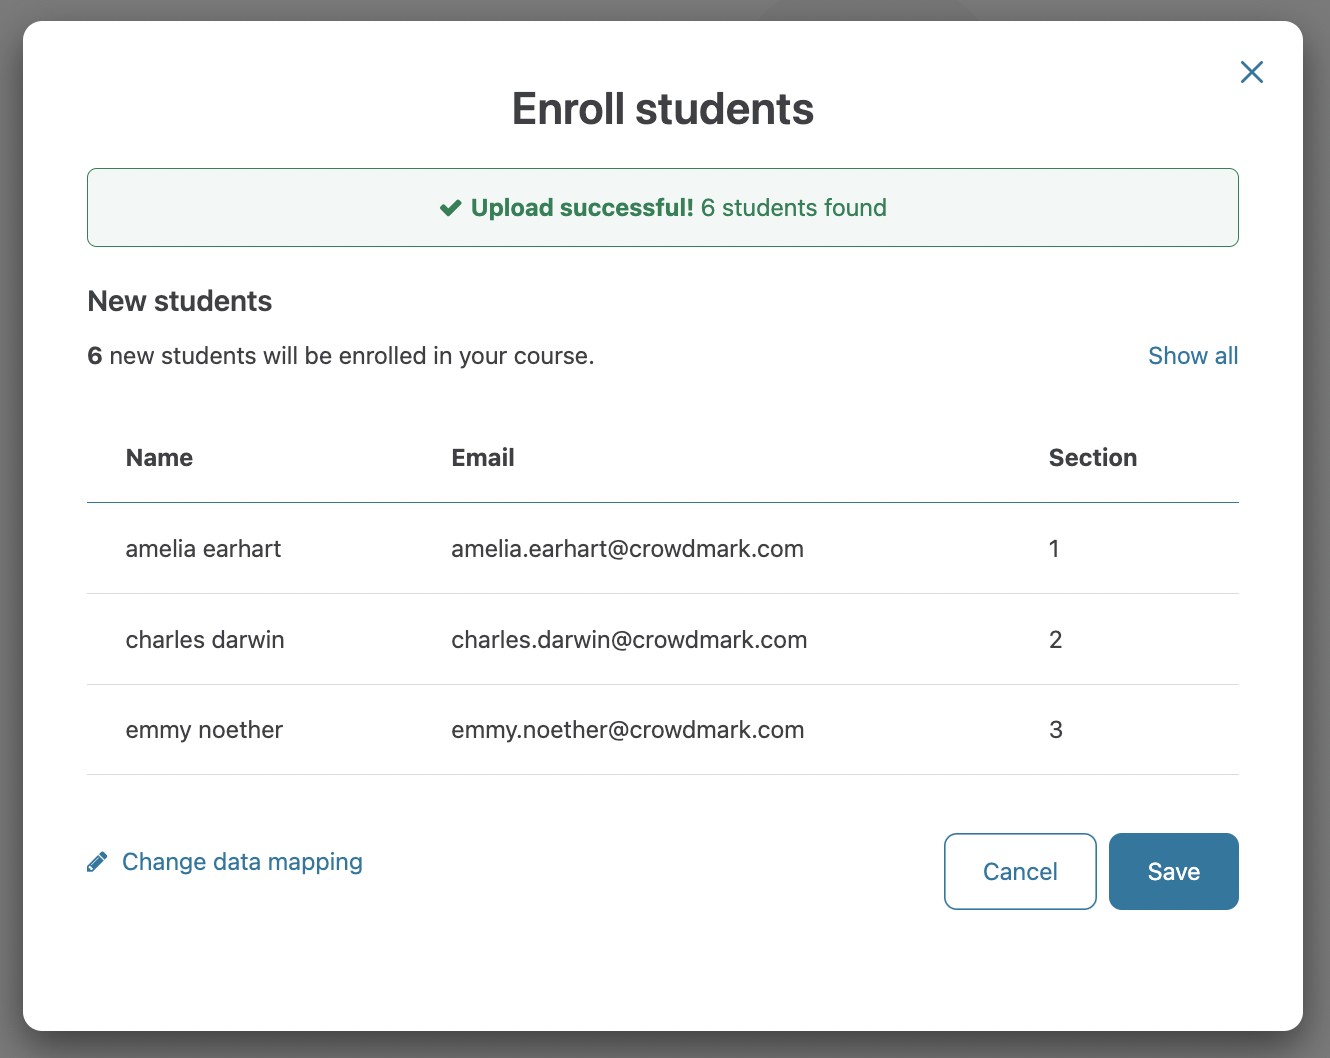
- If the upload was successful you will see the number of students that were found in the file and be asked to map the CSV columns to Crowdmark’s data structure. Based on your column names, Crowdmark will guess the data that they contain. Make sure that each column is mapped correctly. Any columns that do not include student Emails, Names, Student ID Numbers or Sections should be ignored.

- Once everything is mapped correctly, click the Continue button. You will see a list of students that will be enrolled for confirmation.

- Click the Save button to confirm and enroll the students to your course.

Enrolling students by email only
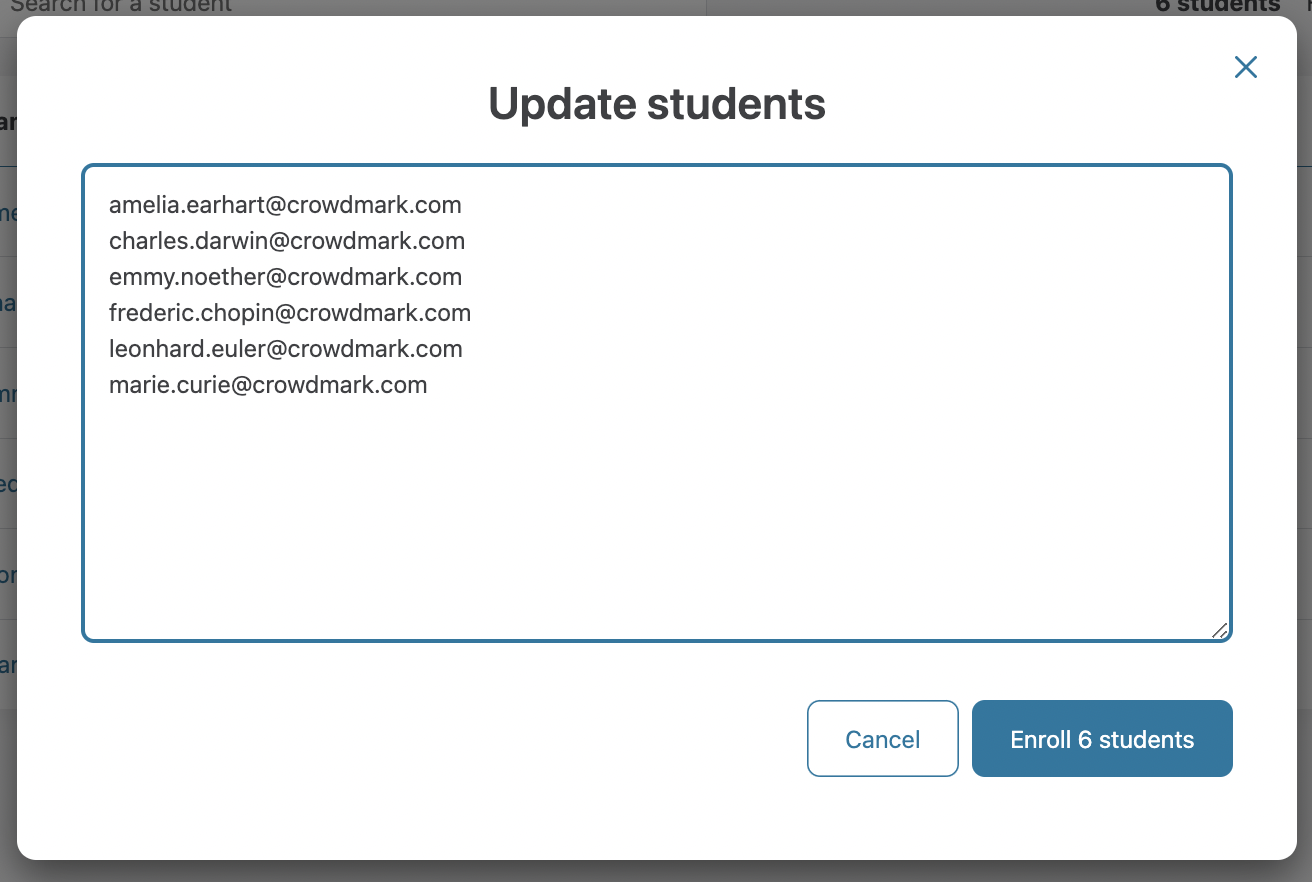
If you cannot upload a CSV file, you can copy and paste a list of students’ emails to enroll them in the course.
- In your course, click Students in the sidebar.
- Click the Enroll students button in the upper right corner. A modal window will appear.
- Click the Enter emails button. A text area will appear.
- Paste or type your students’ emails and click the Enroll students button. The students will be enrolled in the course.

Note: when students are added by email, their First name, Last name, Student ID and/or Section will need to be updated manually.
Updating, enrolling, and disenrolling students
You can update your students’ information, enroll, or disenroll students in a couple of ways: by uploading a CSV file with your student roster or manually in Crowdmark.
Some things to consider before you add students:
- If you have already created an Administered assessment, you must have generated enough extra booklets during the setup to cover the number of students you will add.
- If you have already created an Assigned assessment, an email with an assessment submission link will be sent to each new student you add.
- If grades from previous assessments have already been sent to students, they will NOT automatically be sent to any new students you add. For Administered assessments you will need to match the student to their booklet first and then send their grades from the Results page.
Updating, enrolling or disenrolling students with a CSV file
Crowdmark expects the CSV file you upload to include your full, current student roster. This means that any changes you make to student information in the CSV file will replace what is currently stored in Crowdmark. If you add a student to the CSV file, Crowdmark will enroll the student in the course. If you remove a student from the CSV file, Crowdmark will disenroll the student from the course.
When a student is enrolled in the course late, they will be automatically included in any assigned assessments where the due date has not yet passed (as long as “All enrolled students” or the student’s section is included in the assessment).
To update students:
- In your course, click Students in the sidebar.
- Click the Update students button in the upper right corner. A modal window will appear.
3. Click the Upload CSV file button. Locate the CSV file on your computer and upload it.
4. If the upload was successful you will see the number of students that were found in the file. If the file has different column names you may be asked to map the CSV columns. If not, you will see a list of students that will be updated and/or disenrolled for confirmation. If the student data columns are no longer mapped correctly, click the Change data mapping link to correct them.
5. Click the Save button to confirm and update the students to your course.
Updating a student manually
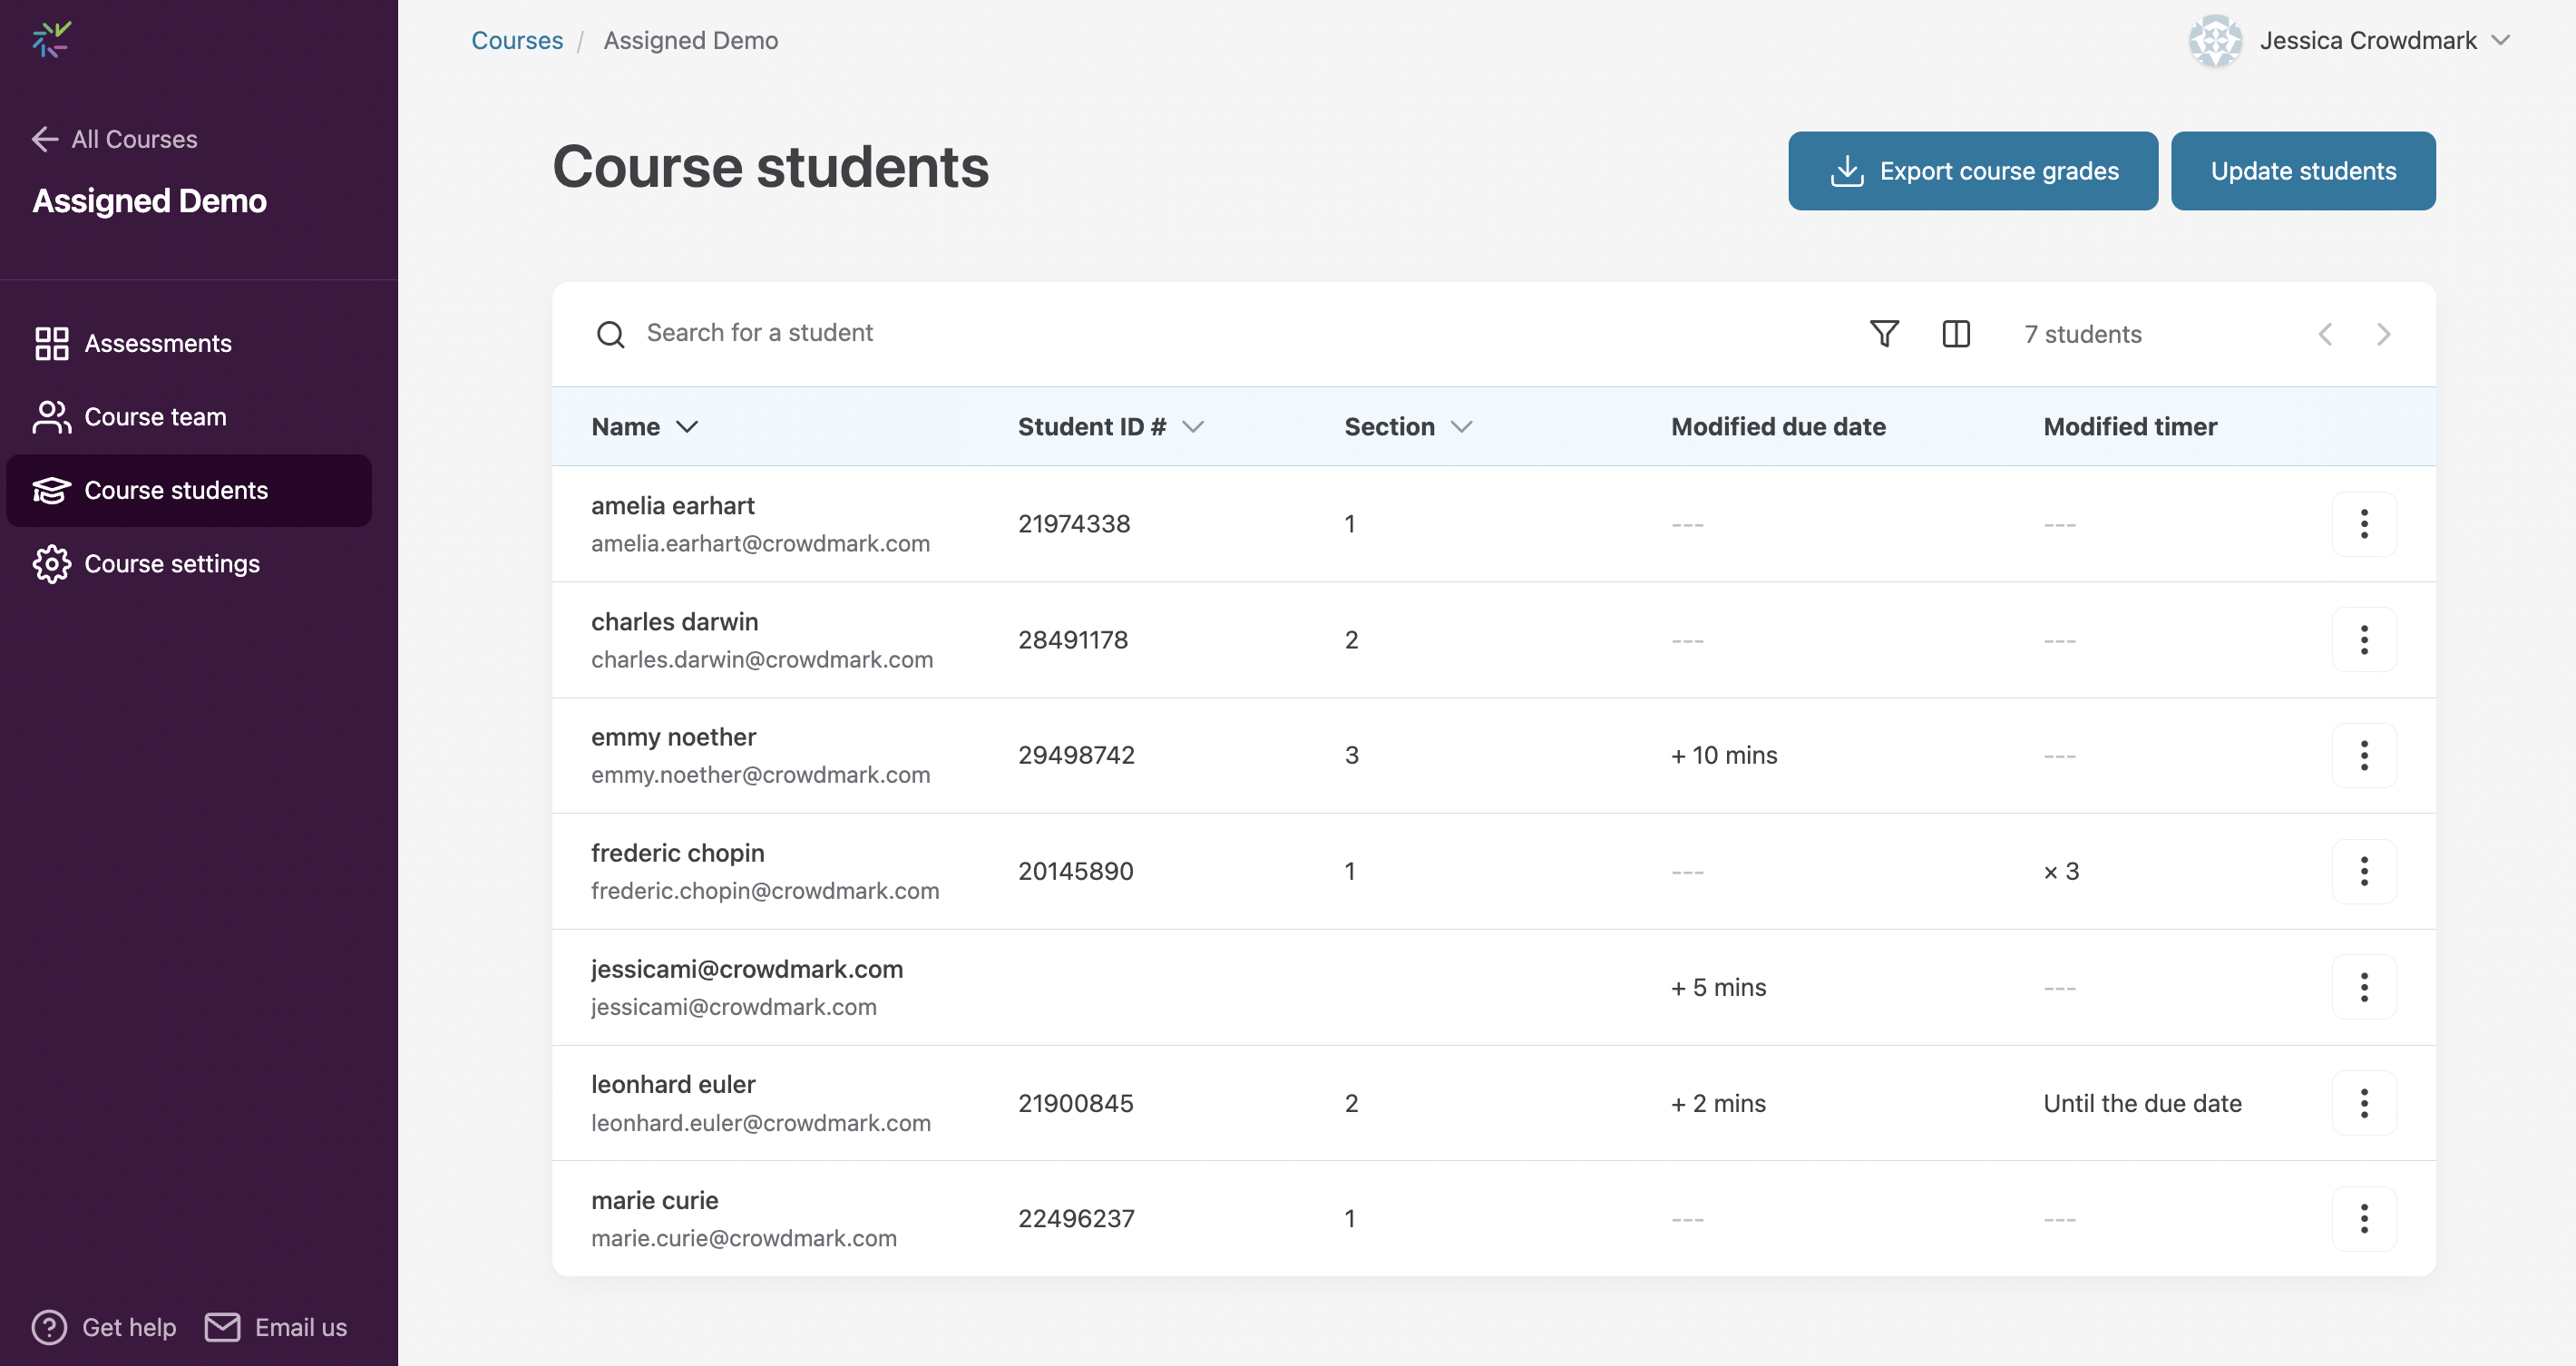
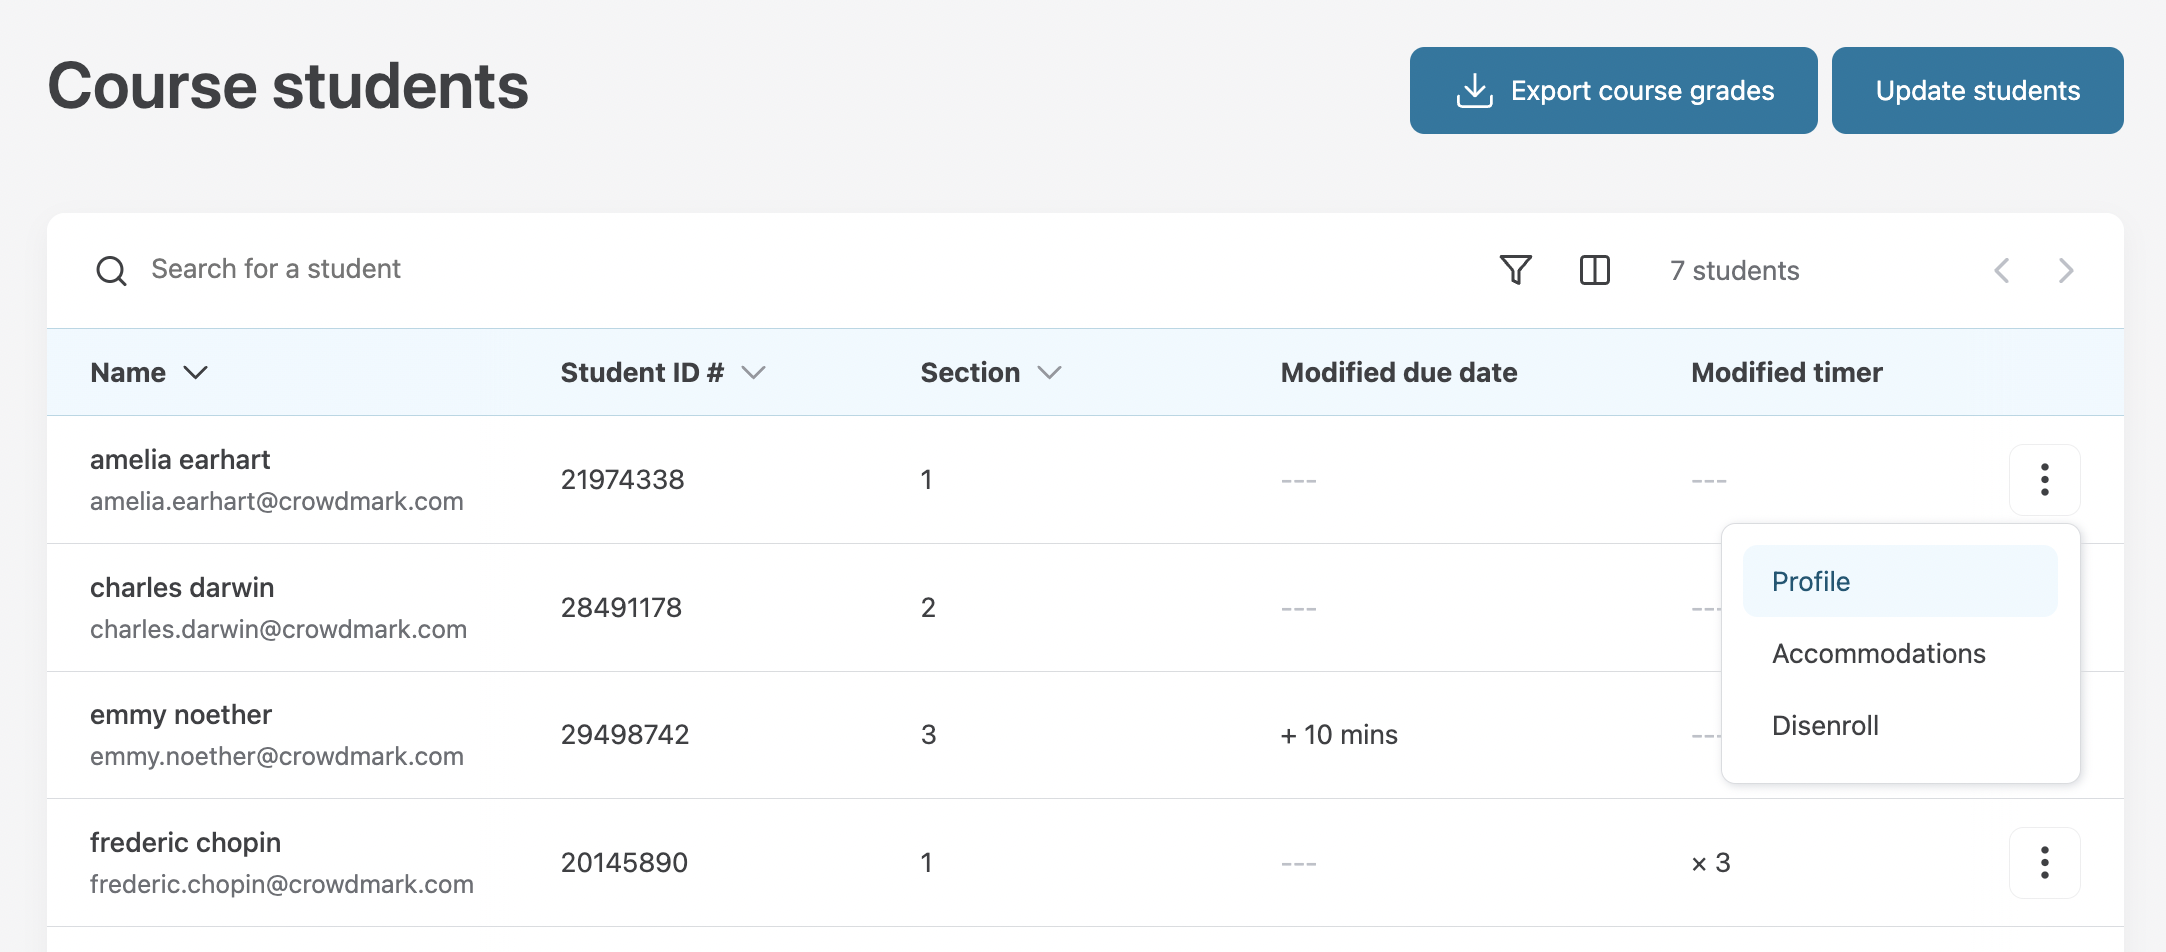
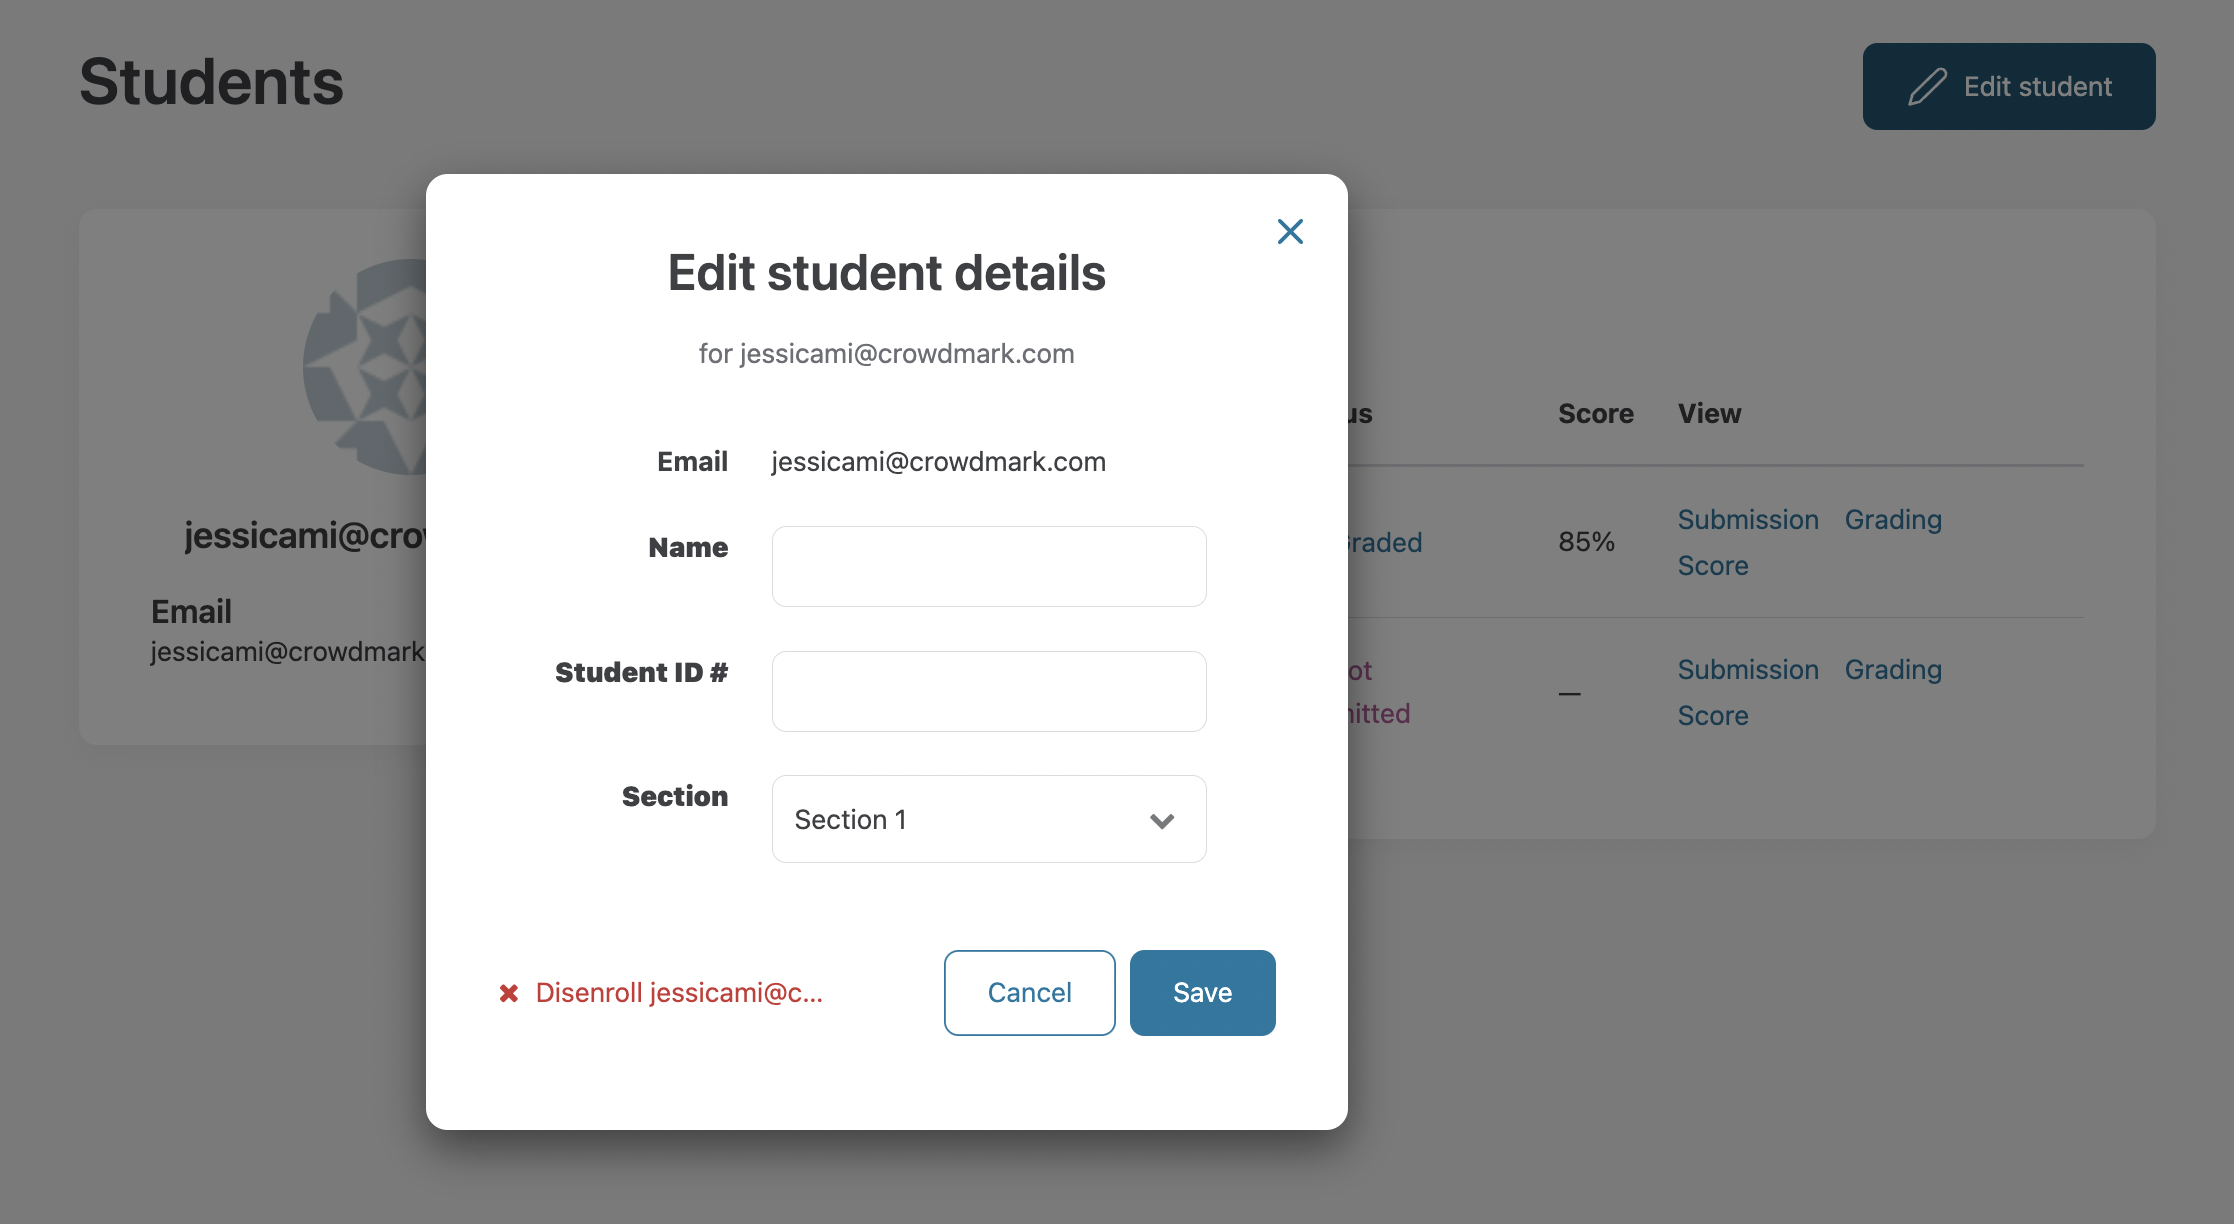
You can change an individual student’s information by locating them in the student list and selecting the three-dot menu that appears at the end of each row to access the student menu. Once selected, choose Profile from the menu to access the selected student’s profile.
The profile page displays personal info and submission status for all assessments the student is part of in the course. Click the Edit student button to modify name, student ID #, or section.
Disenrolling a student manually
You can remove a student from future assessments by disenrolling them on the Course students page. Keep in mind that if you upload a CSV file containing the student after manually disenrolling them, they will be re-enrolled.
- In your course, click Students in the sidebar. You will see a list of students.
- Find the student you’re looking for in the student list and click on the three-dot menu that appears at the end of the row to access the student menu.
3. Choose Disenroll from the menu to remove the student.
Sorting the student list
The student list can be sorted alphabetically (by first name), by email address, student ID or section. When you import your student list it will be sorted alphabetically A-Z by default. Use the arrows in your column headers to sort the student list as needed.
Crowdmark displays a student’s name as First name Last name by default. If you’d like to display surnames first (or sort by surname), reverse the First name and Last name columns when mapping your student data on import.