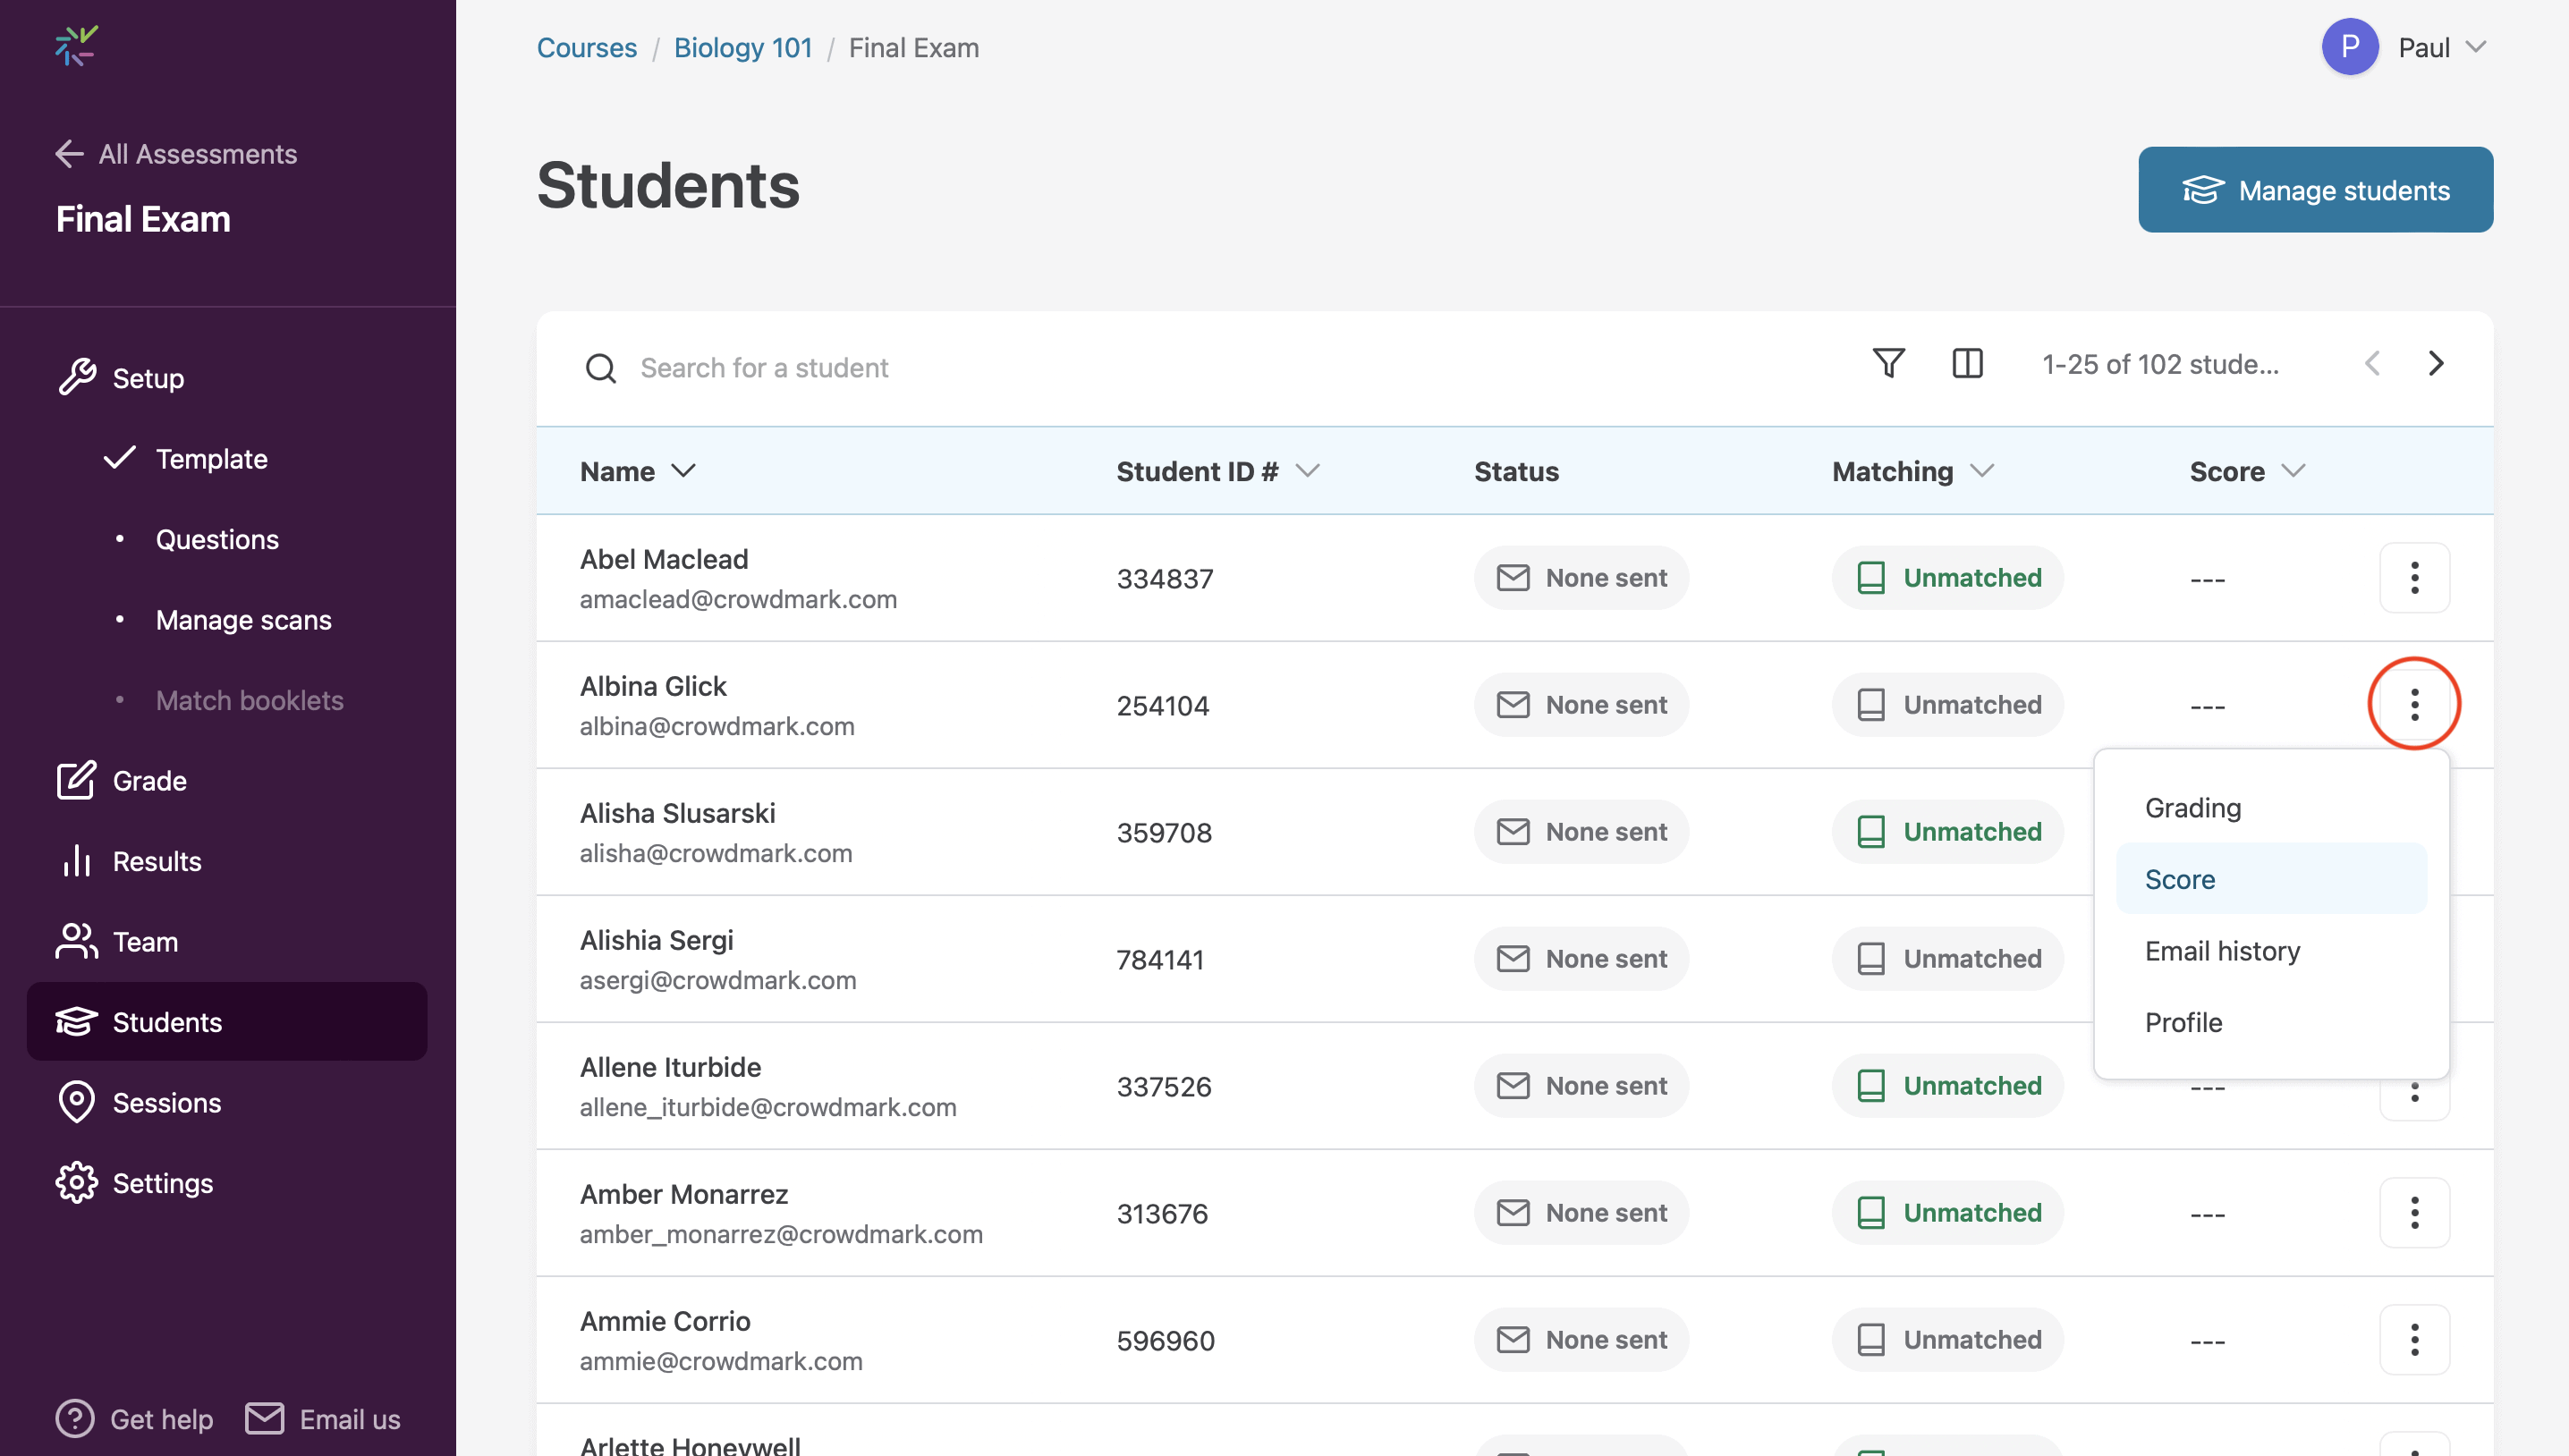
The Students page of an Administered Assessment contains a wealth of information available to Facilitators and Instructors.
What can you see on the Students page?
- Name: This information includes either the student’s name, email address, or both, and corresponds to what is listed on your Course’s Students page.
- Student ID #: If you have updated student information in your course roster to include student ID #’s, this unique identifier will be displayed in this column.
- Section: If your course has sections, you can see which section each student belongs to.
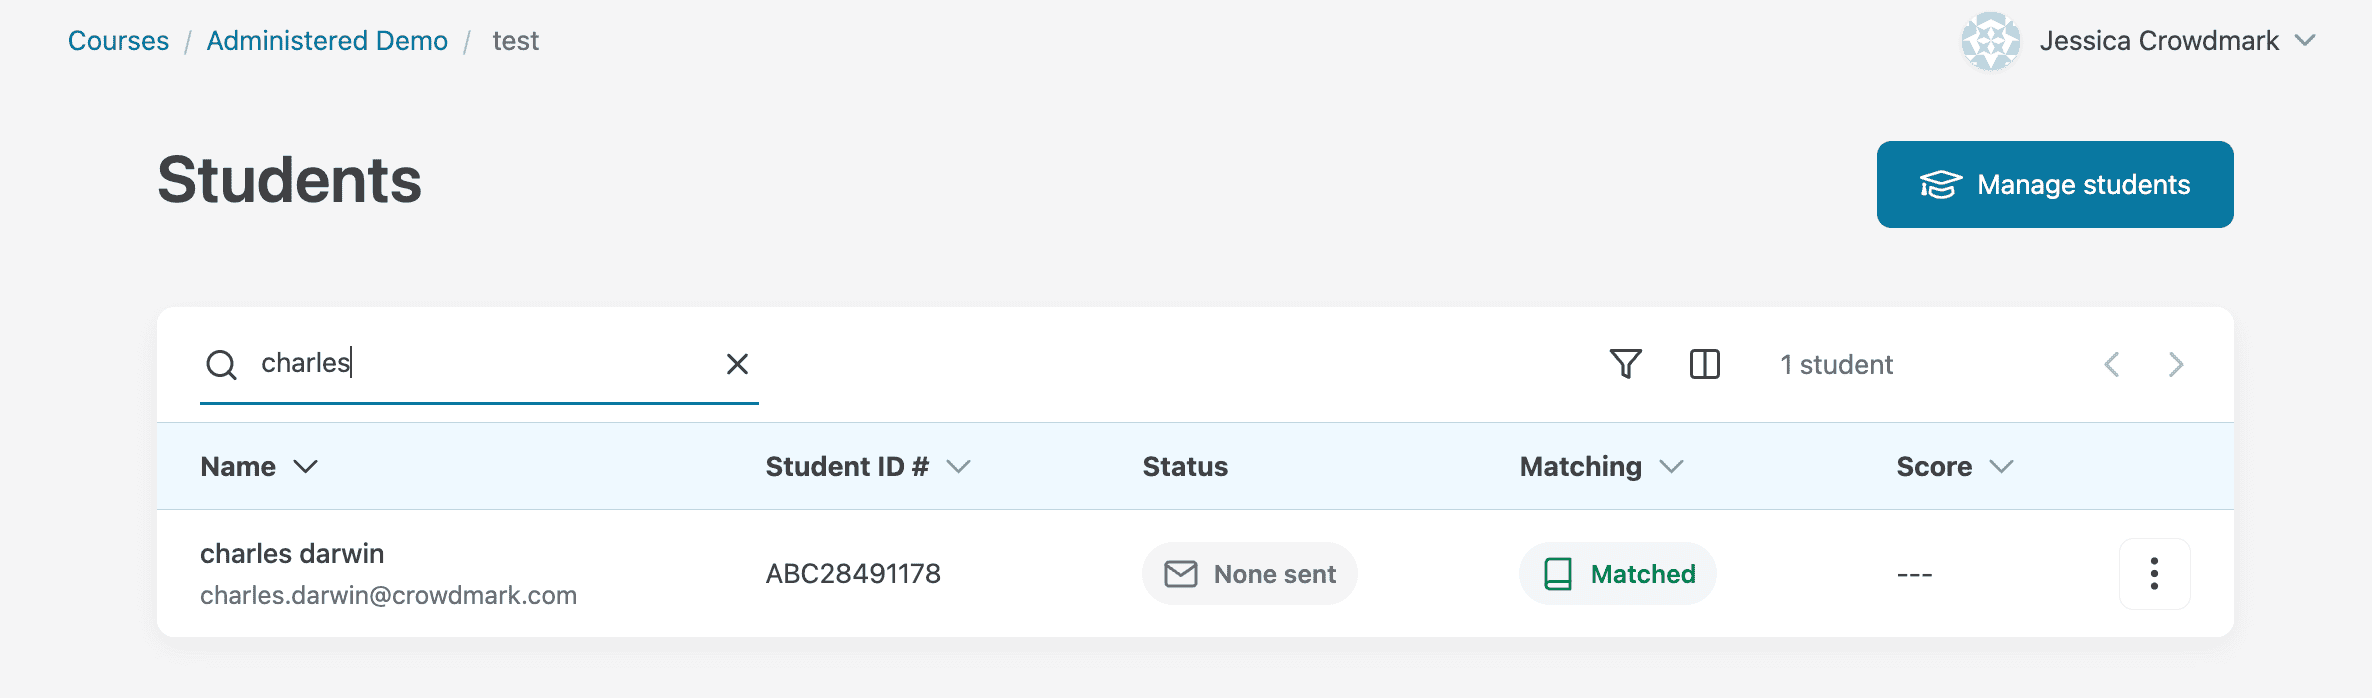
- Status: This column indicates whether email notification has been sent to students. Clicking on the Email status will provide more information on the student’s contact email address, as well as the number of emails that have been sent, and an option to resend an email.
- Matching: This column indicates whether a student’s booklet has been successfully matched, or if it remains unmatched. Review a successful match by clicking on the Matched status chip.
- Score: This column allows you to see student scores at a glance.

You can scroll side to side to view all columns in the student table.
Search
Find any student in seconds by using the integrated search bar. Search by any available student data including name, email, or student ID.
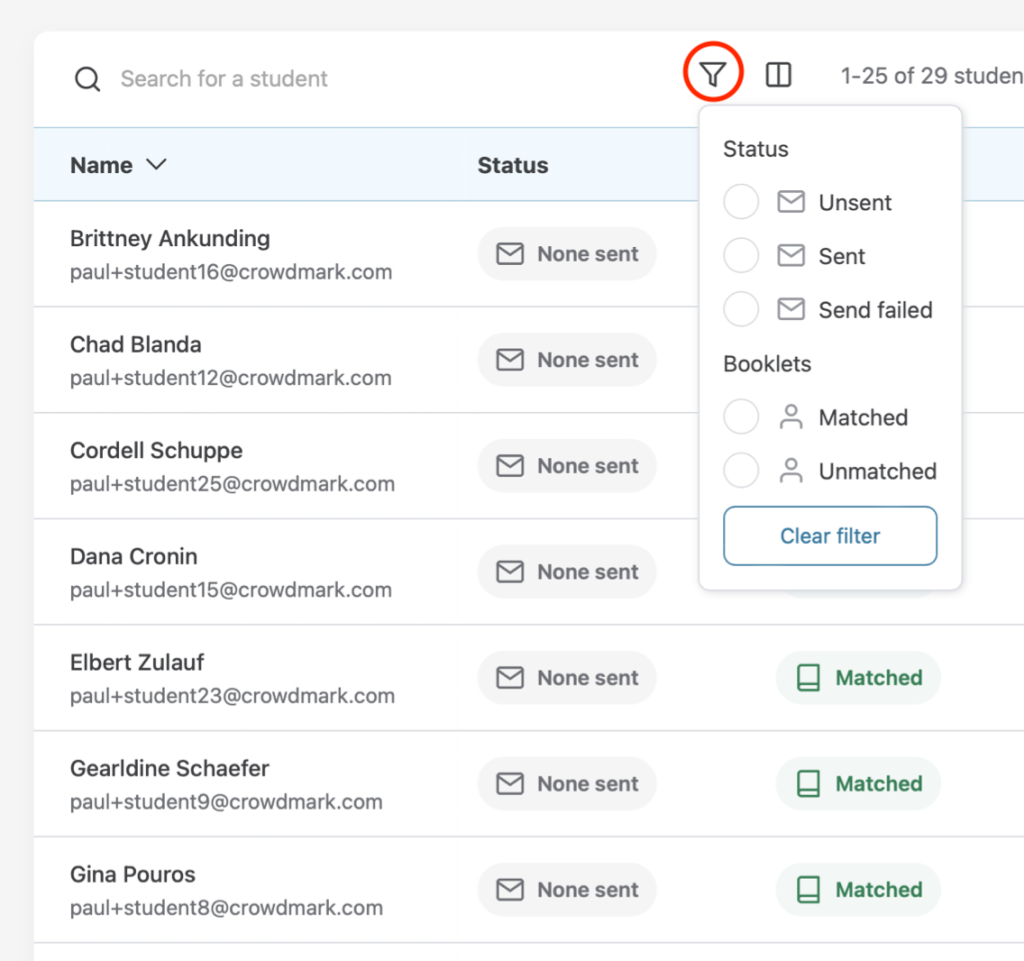
Filters
Use filters to find groups of students who have something in common, such as email status and matching status. To view all students again, simply click on the Clear filter button to remove any selections.
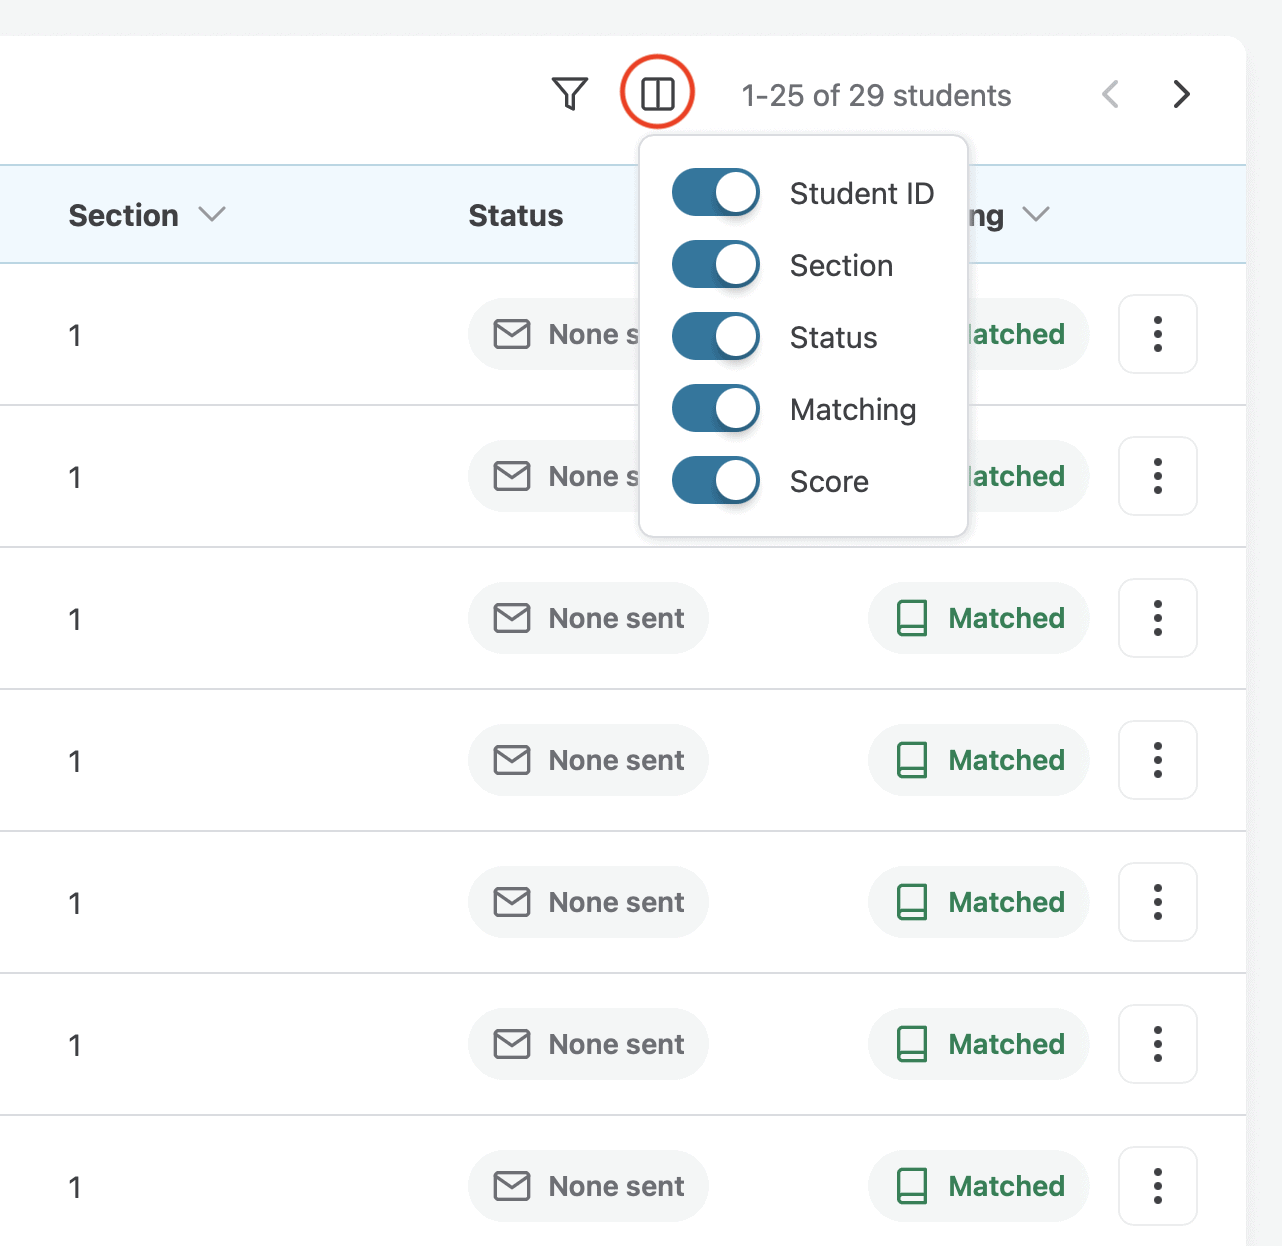
Custom views
Use this tool to customize which columns are visible. Toggle columns on or off based on your preferences or needs. Any changes you make will be saved for all student tables in Administered assessments.
On desktop devices, both the first and last columns are frozen to maintain context when viewing large tables. On mobile devices, only the last column is frozen. Frozen columns ensure that the student name, email, and the student menu remain visible at all times.
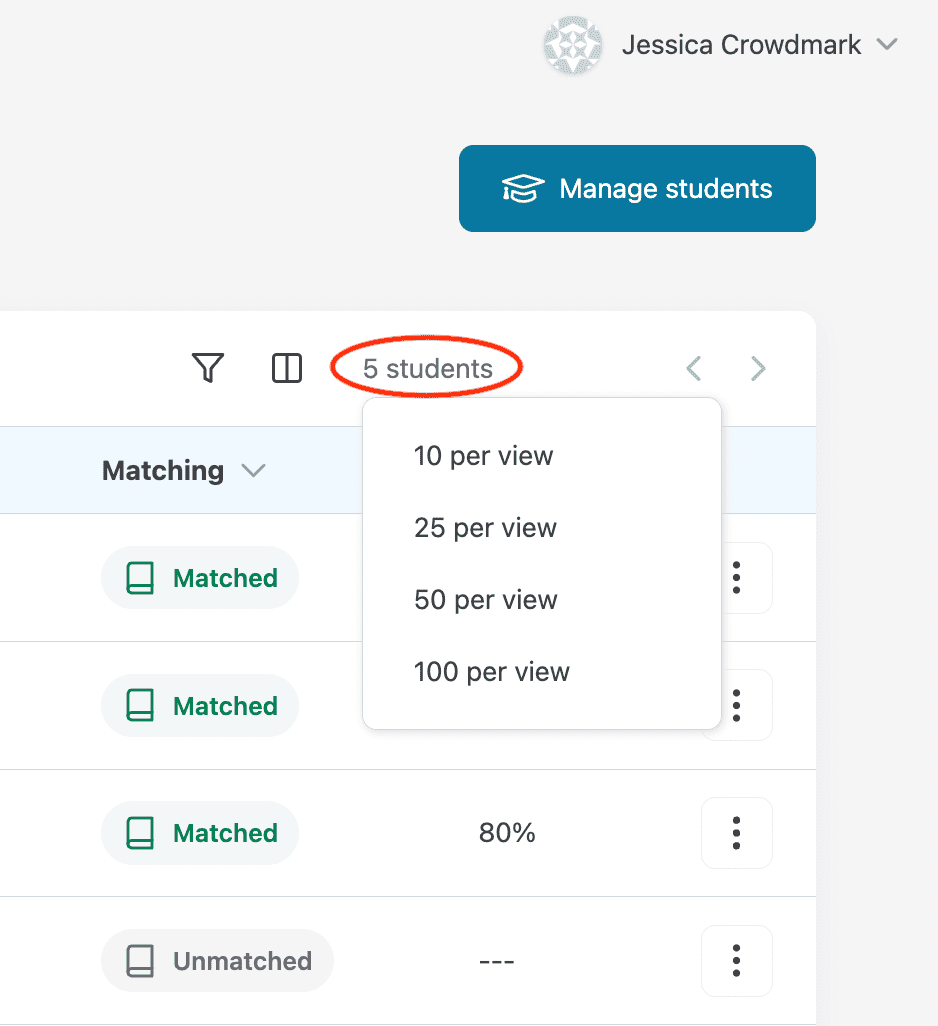
Pagination
Change the number of student records that appear on each page by clicking on the number label. Choose from 10 to 100 records per page. Any changes you make will be saved for all student tables in Administered assessments.
Status
Emails are sent to students when grades are released. The Status column offers insights into whether emails were sent successfully or if there are issues. Clicking an email status opens the Email history drawer. Here, you can review the email address used, the number of sent emails, and troubleshoot any failures. You’ll also find the option to resend an email.
Learn what each status indicator means:
|
Status |
Description |
|
None sent |
Emails will be sent when you click the Send grades to students button |
|
Sent |
The email has been sent successfully |
|
Failed |
The email failed to send. You can try resending the email. If this doesn’t work, please contact Crowdmark Support. |
Matching
The Matching column tells you whether a student has been successfully matched to a booklet. If a student has been matched, you can review the match by clicking on the Matched status chip.
Here’s what the different matching status indicators mean:
|
Status |
Description |
|
Matched |
The student has been successfully matched to a booklet. |
|
Unmatched |
The student is yet to be matched to a booklet |
Student menu
Click on the three-dot menu that appears at the end of each row to access the Student menu. This menu provides easy access to all student-related actions in a single location. For Administered assessments, you can perform the following actions:
- Access student work in the grading interface
- See the score page
- Check email history for sent emails
- Visit the student’s profile page
To ensure the best viewing experience, some menu items will open in a full-screen view or side drawer. To leave these views and return to the student table, simply click the close icon positioned in the top-left corner of your screen.
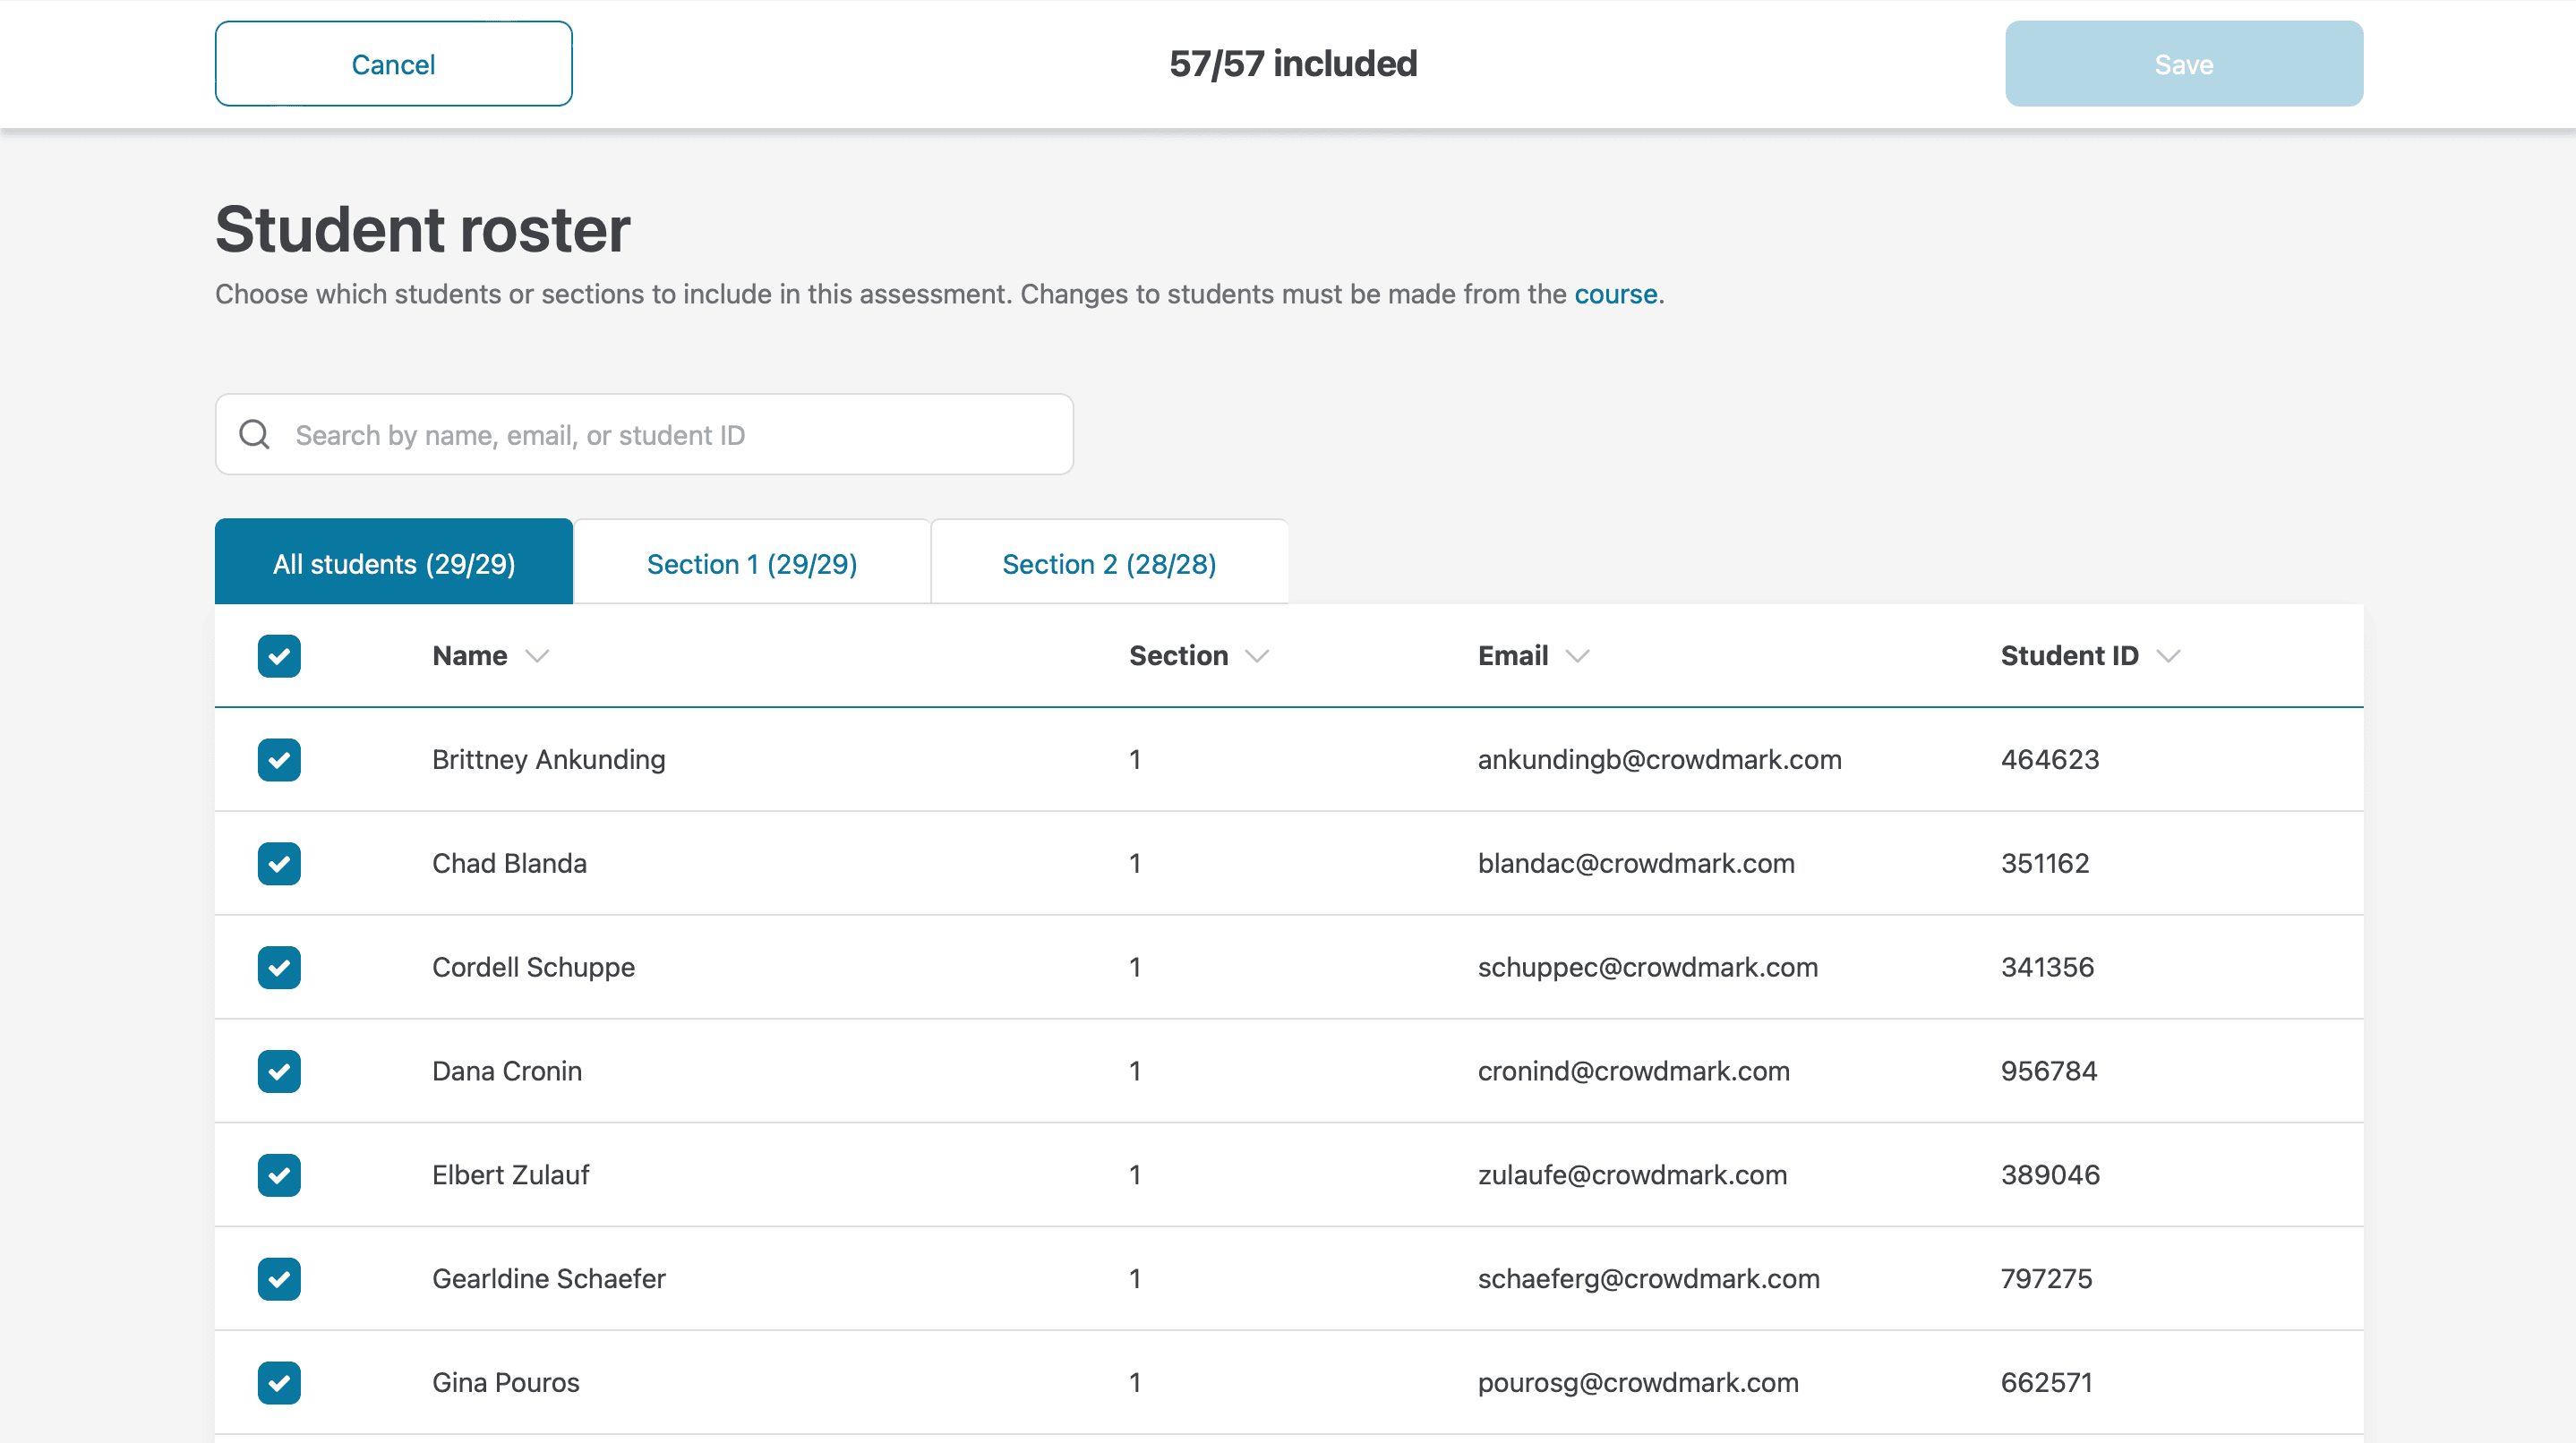
Including or excluding students
Access the student roster tool by clicking the Manage students button. The student roster will indicate which students have been included in the assessment. If sections are available in your course, you can use the tabs above the list of students to navigate between sections. Click checkboxes next to students to include or exclude them from the assessment. To select or deselect an entire section, use the checkbox at the top of the page to include or exclude all students in that tab. You can also use the search function to find a student in any section.