Team members include co-instructors, TAs, graders, anyone who will help with printing, scanning or grading assessments in your course. A description of each role can be found here: What is the difference between team member roles?
Adding team members
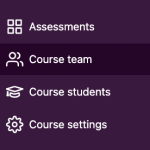
- In your course, click Team in the sidebar.

- Click the Sync with LMS button in the upper right corner. A modal window will appear.
- You will see a list of the synced team members. Under the Role column, select the role each team member should have. To remove a team member, click the x. For more information, see What is the difference between team member roles?
- Click the Add team members button. Your team members will be added to the course and will each receive an invitation email.
Removing team members
From the Team page, a team member can be removed by clicking the x beside their name. This will remove their access to the course and its assessments but all of their past grading and data on Crowdmark will be preserved.
Adding a printer or uploader
If you need to invite a printer or uploader who does not have access to Canvas (an off-campus print shop, for example), you can invite them by email.
- In your course, click Team in the sidebar.
- Click the Add by email button in the upper right corner. A modal window will appear.
- Type or paste the printer/uploader’s email addresses in the field. Click the Continue button.
- Under the Role column, select the Printer-Uploader role.
- Click the Add team member button. The printer/uploader will be added to the course and will receive an invitation email.